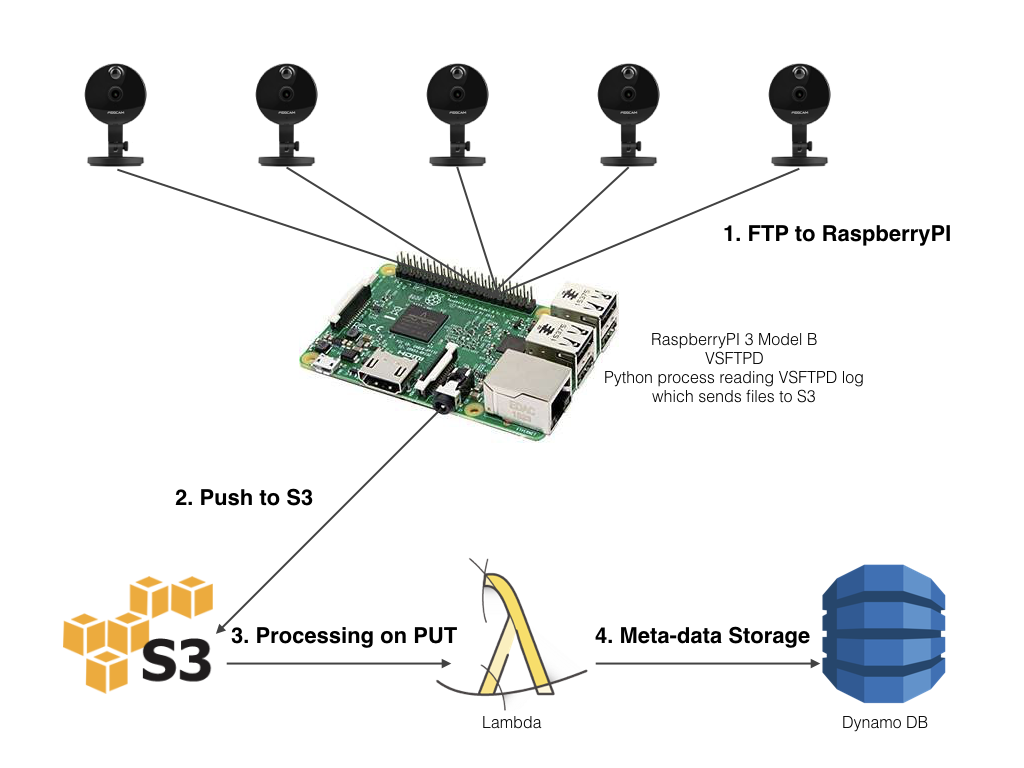
In part one of this series I briefly discussed the purpose of the application to be built and reviewed the IoT local controller & gateway pattern I’ve deployed. To recap, I have a series of IP cameras deployed and configured to send (via FTP) images and videos to a central controller (RaspberryPI 3 Model B). The controller processes those files as they arrive and pushes them to Amazon S3. The code for the controller process can be found on GitHub.
In this post we will move on to the serverless processing of the videos when they arrive in S3.
The image below provides an overview of the device, local controller & gateway, S3 and serverless processing environment.
S3 Configuration
The images and videos are stored in an S3 bucket and folder (object path). The following configuration parameters found in config.json (created from the example-config.json found in the referenced GitHub project) enable the processor to use the correct bucket and folder. In my case I use the following:
"s3_info": {
  "bucket_name": "security-alarms",
  "object_base": "patrolcams"
}
You will need to create the S3 bucket and folder and configure them as follows.
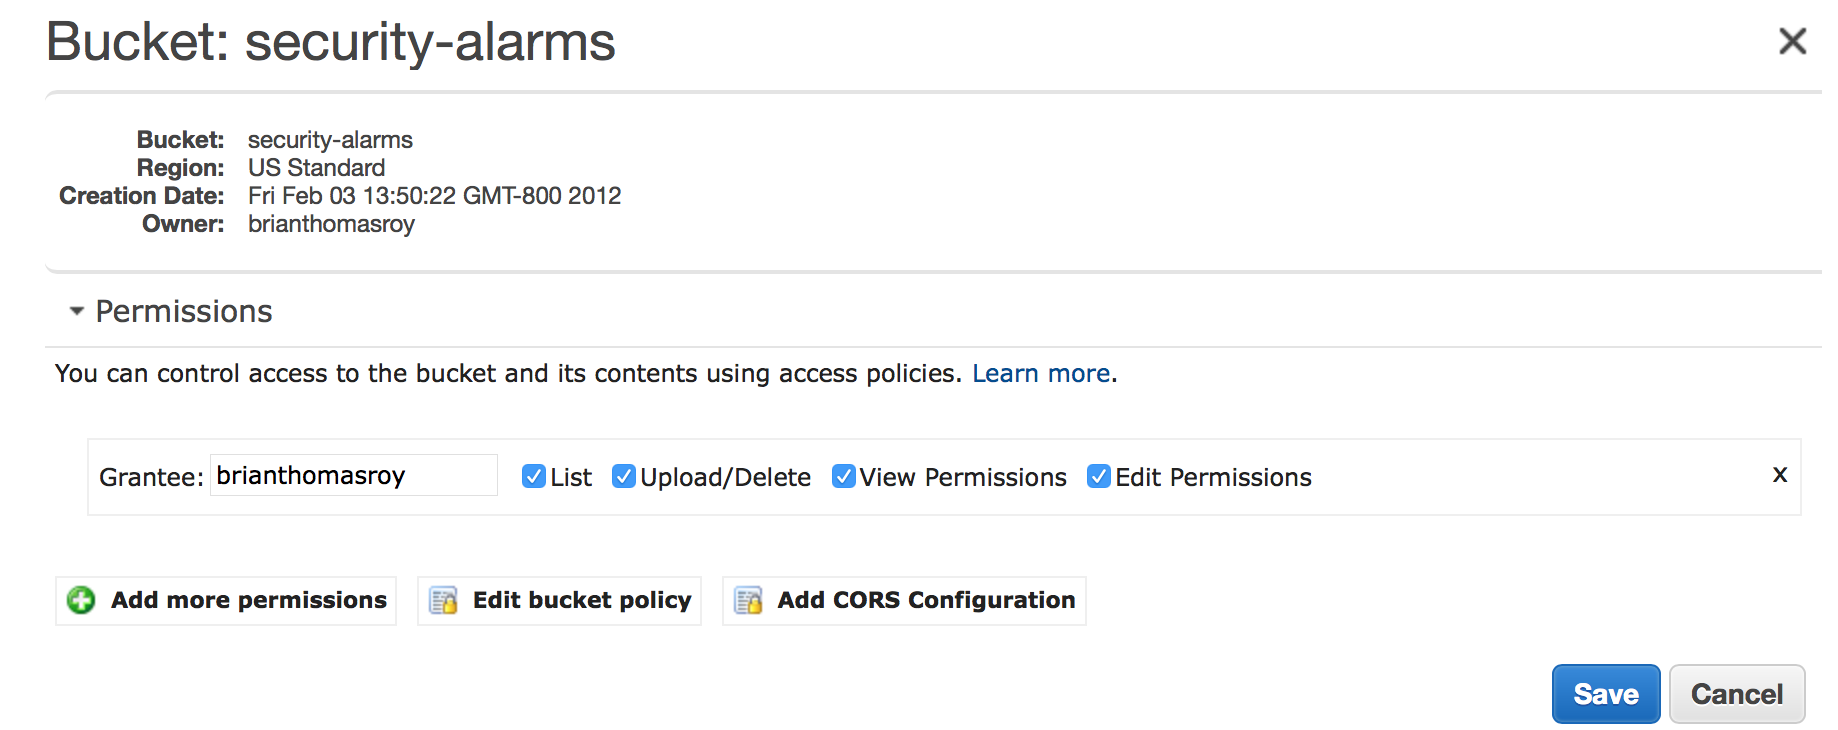
Before you do anything else, ensure the bucket is secure. It should not have public access. Upload/Delete and permission management should be restricted. In my case, only I am able to do anything with this bucket:
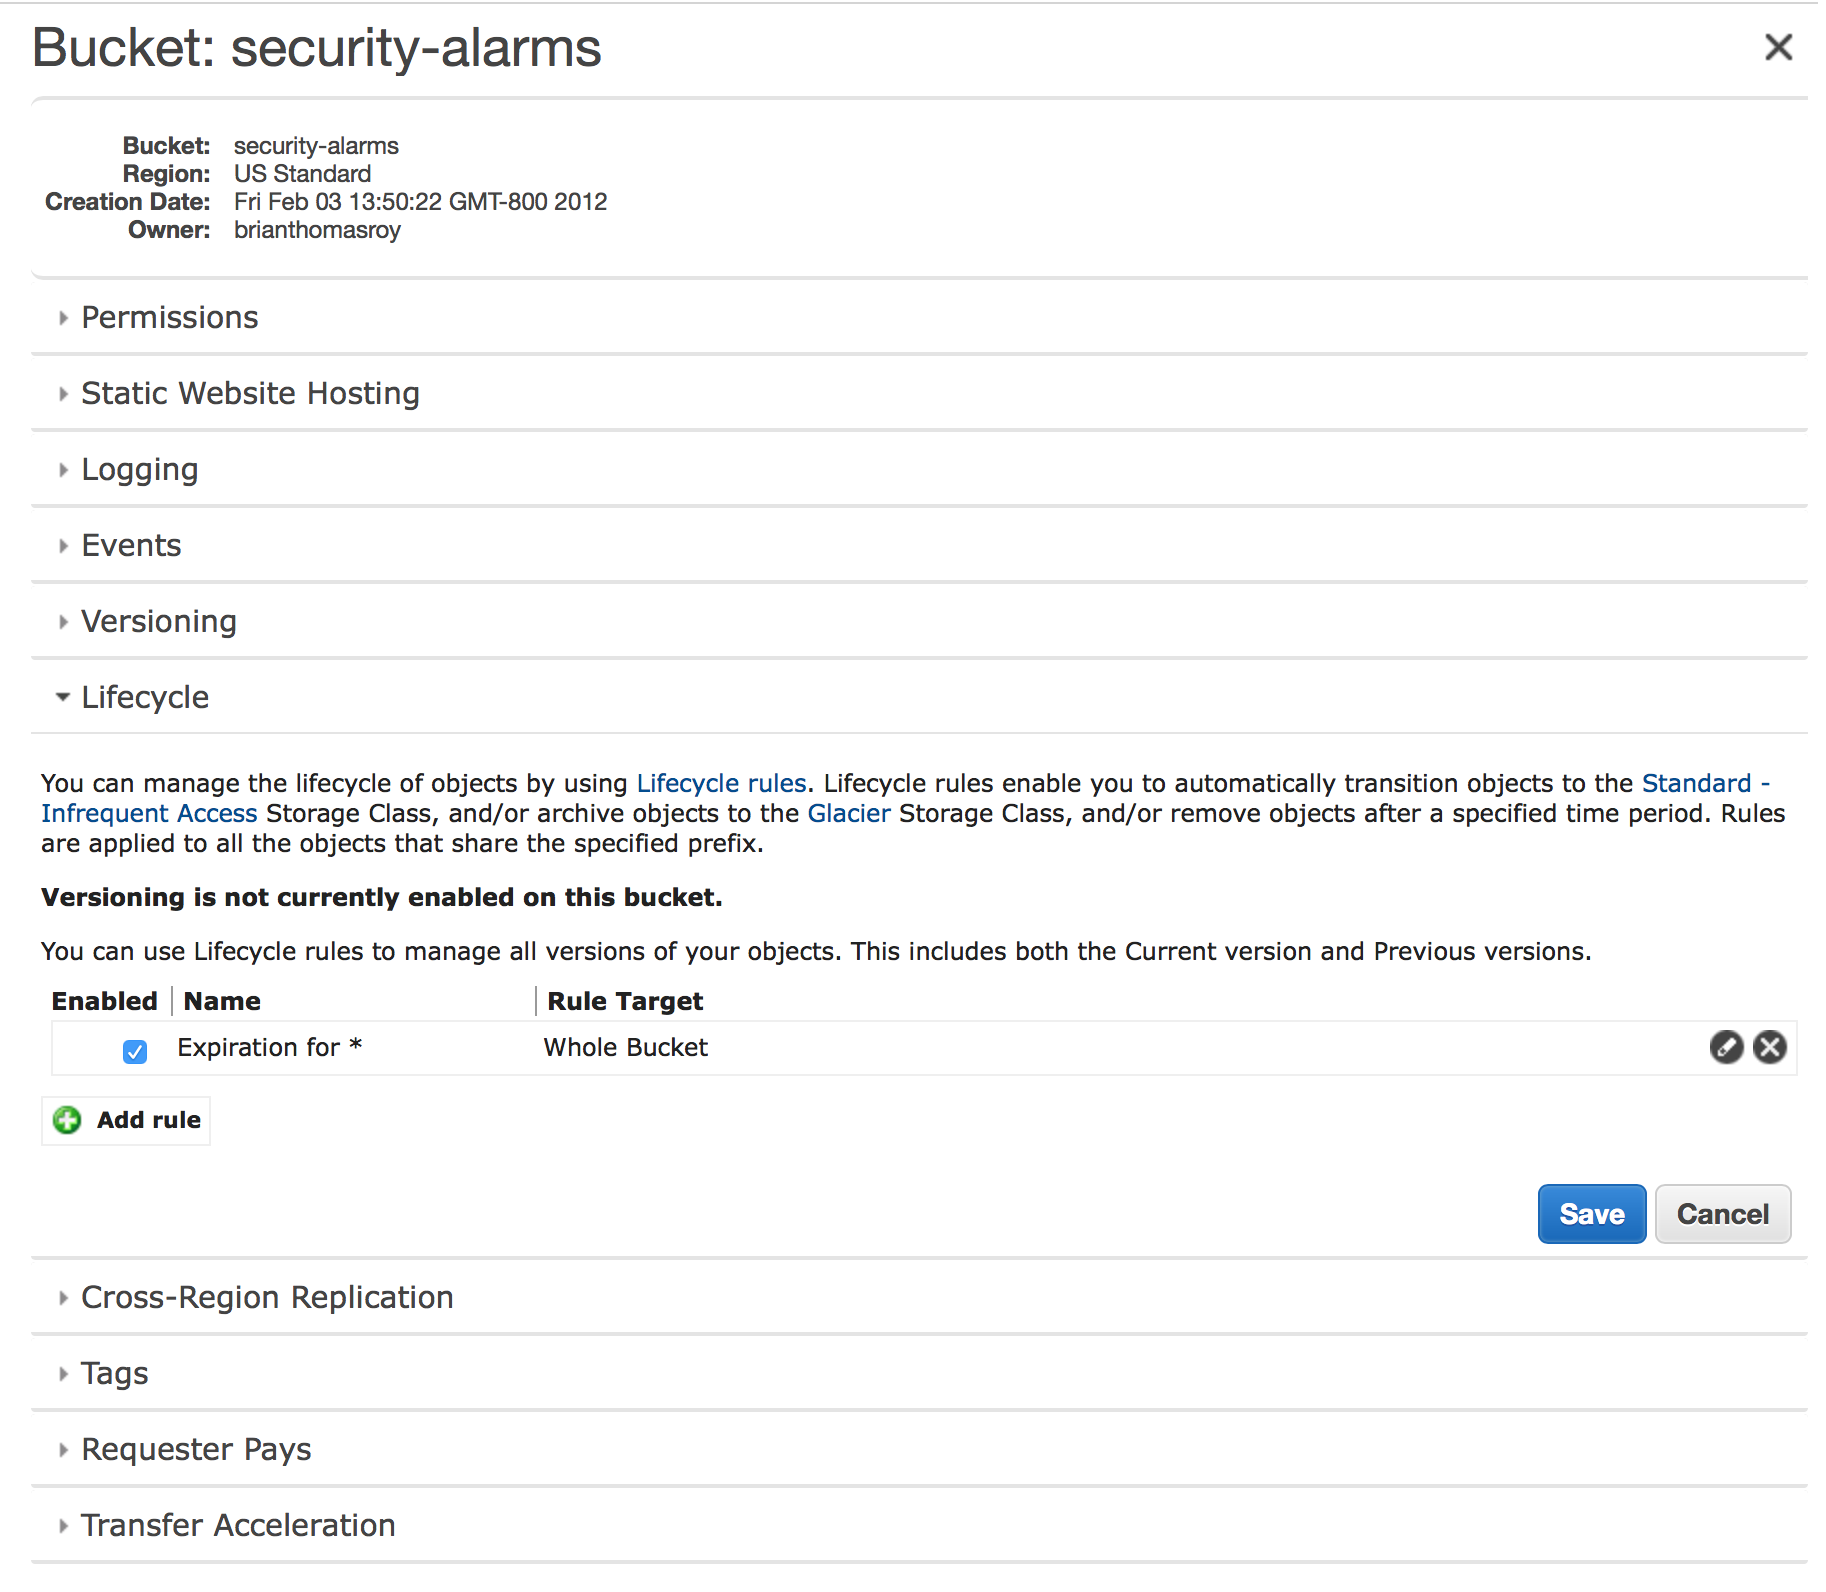
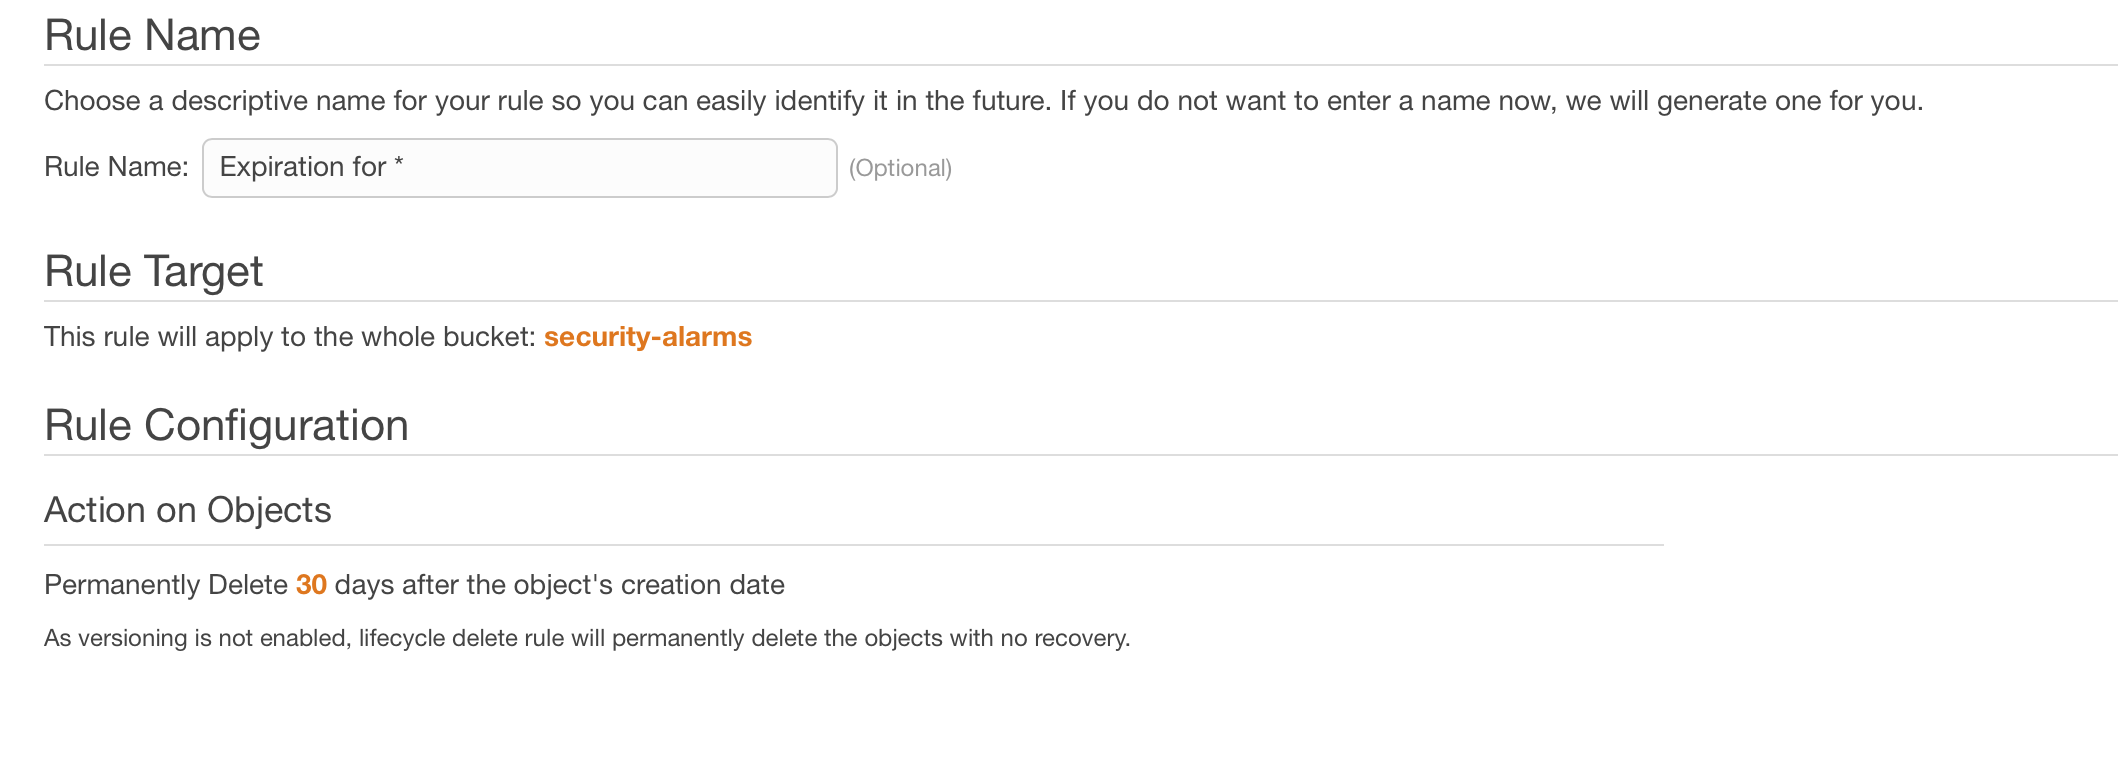
The bucket should be configured with a Lifecycle – or expiration – policy. This ensures that the images and videos will be deleted automatically by S3 after some reasonable amount of time – in my case 30 days.
Optionally, you can configure the folder to use a different storage class and/or to encrypt the data in S3.
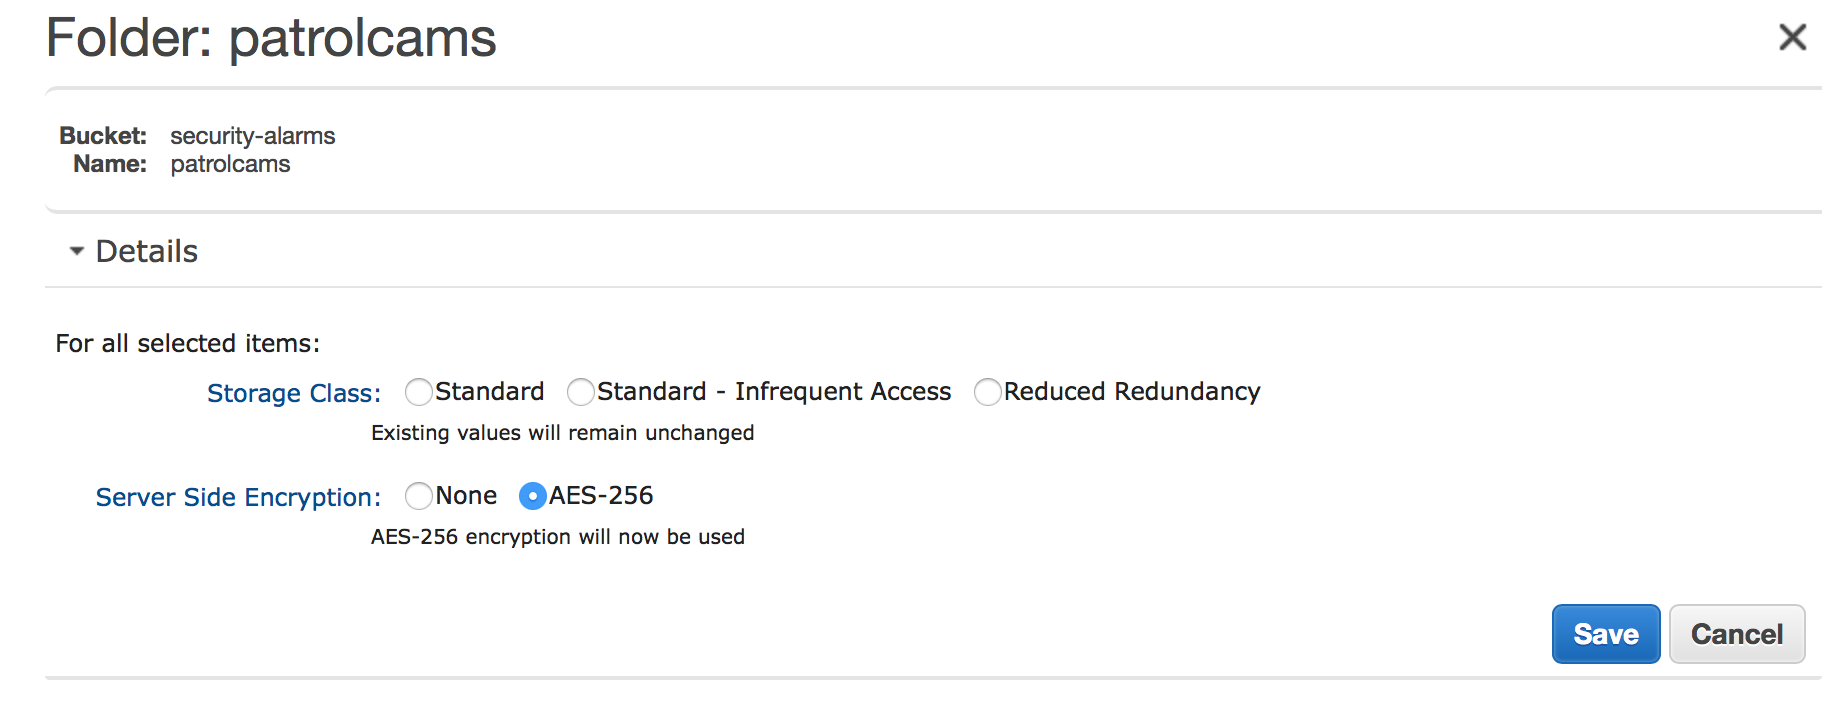
File Storage Scheme
The controller process stores the images and videos in a specific structure under our bucket/folder:

The structure is as follows:
camera_name/date/hour/
The date and hour values are in the local time of the processor (which – as it turns out caused some issues I’ll discuss later in the series).
In each hour folder there is are two folders:
- snap
- record
The “snap” folder holds still images and the “record” folder contains video files.
Once your S3 is configured and the processor is sending files to S3 we can move on to setting up the serverless processing of the images and videos on arrival in S3.
Serverless Processing on Arrival
When the video file arrives we want to create a metadata catalog entry for it in DynamoDB. This will allow us to – later – create a REST API and application that can browse that catalog.
DynamoDB Configuration
Two tables need to be created:
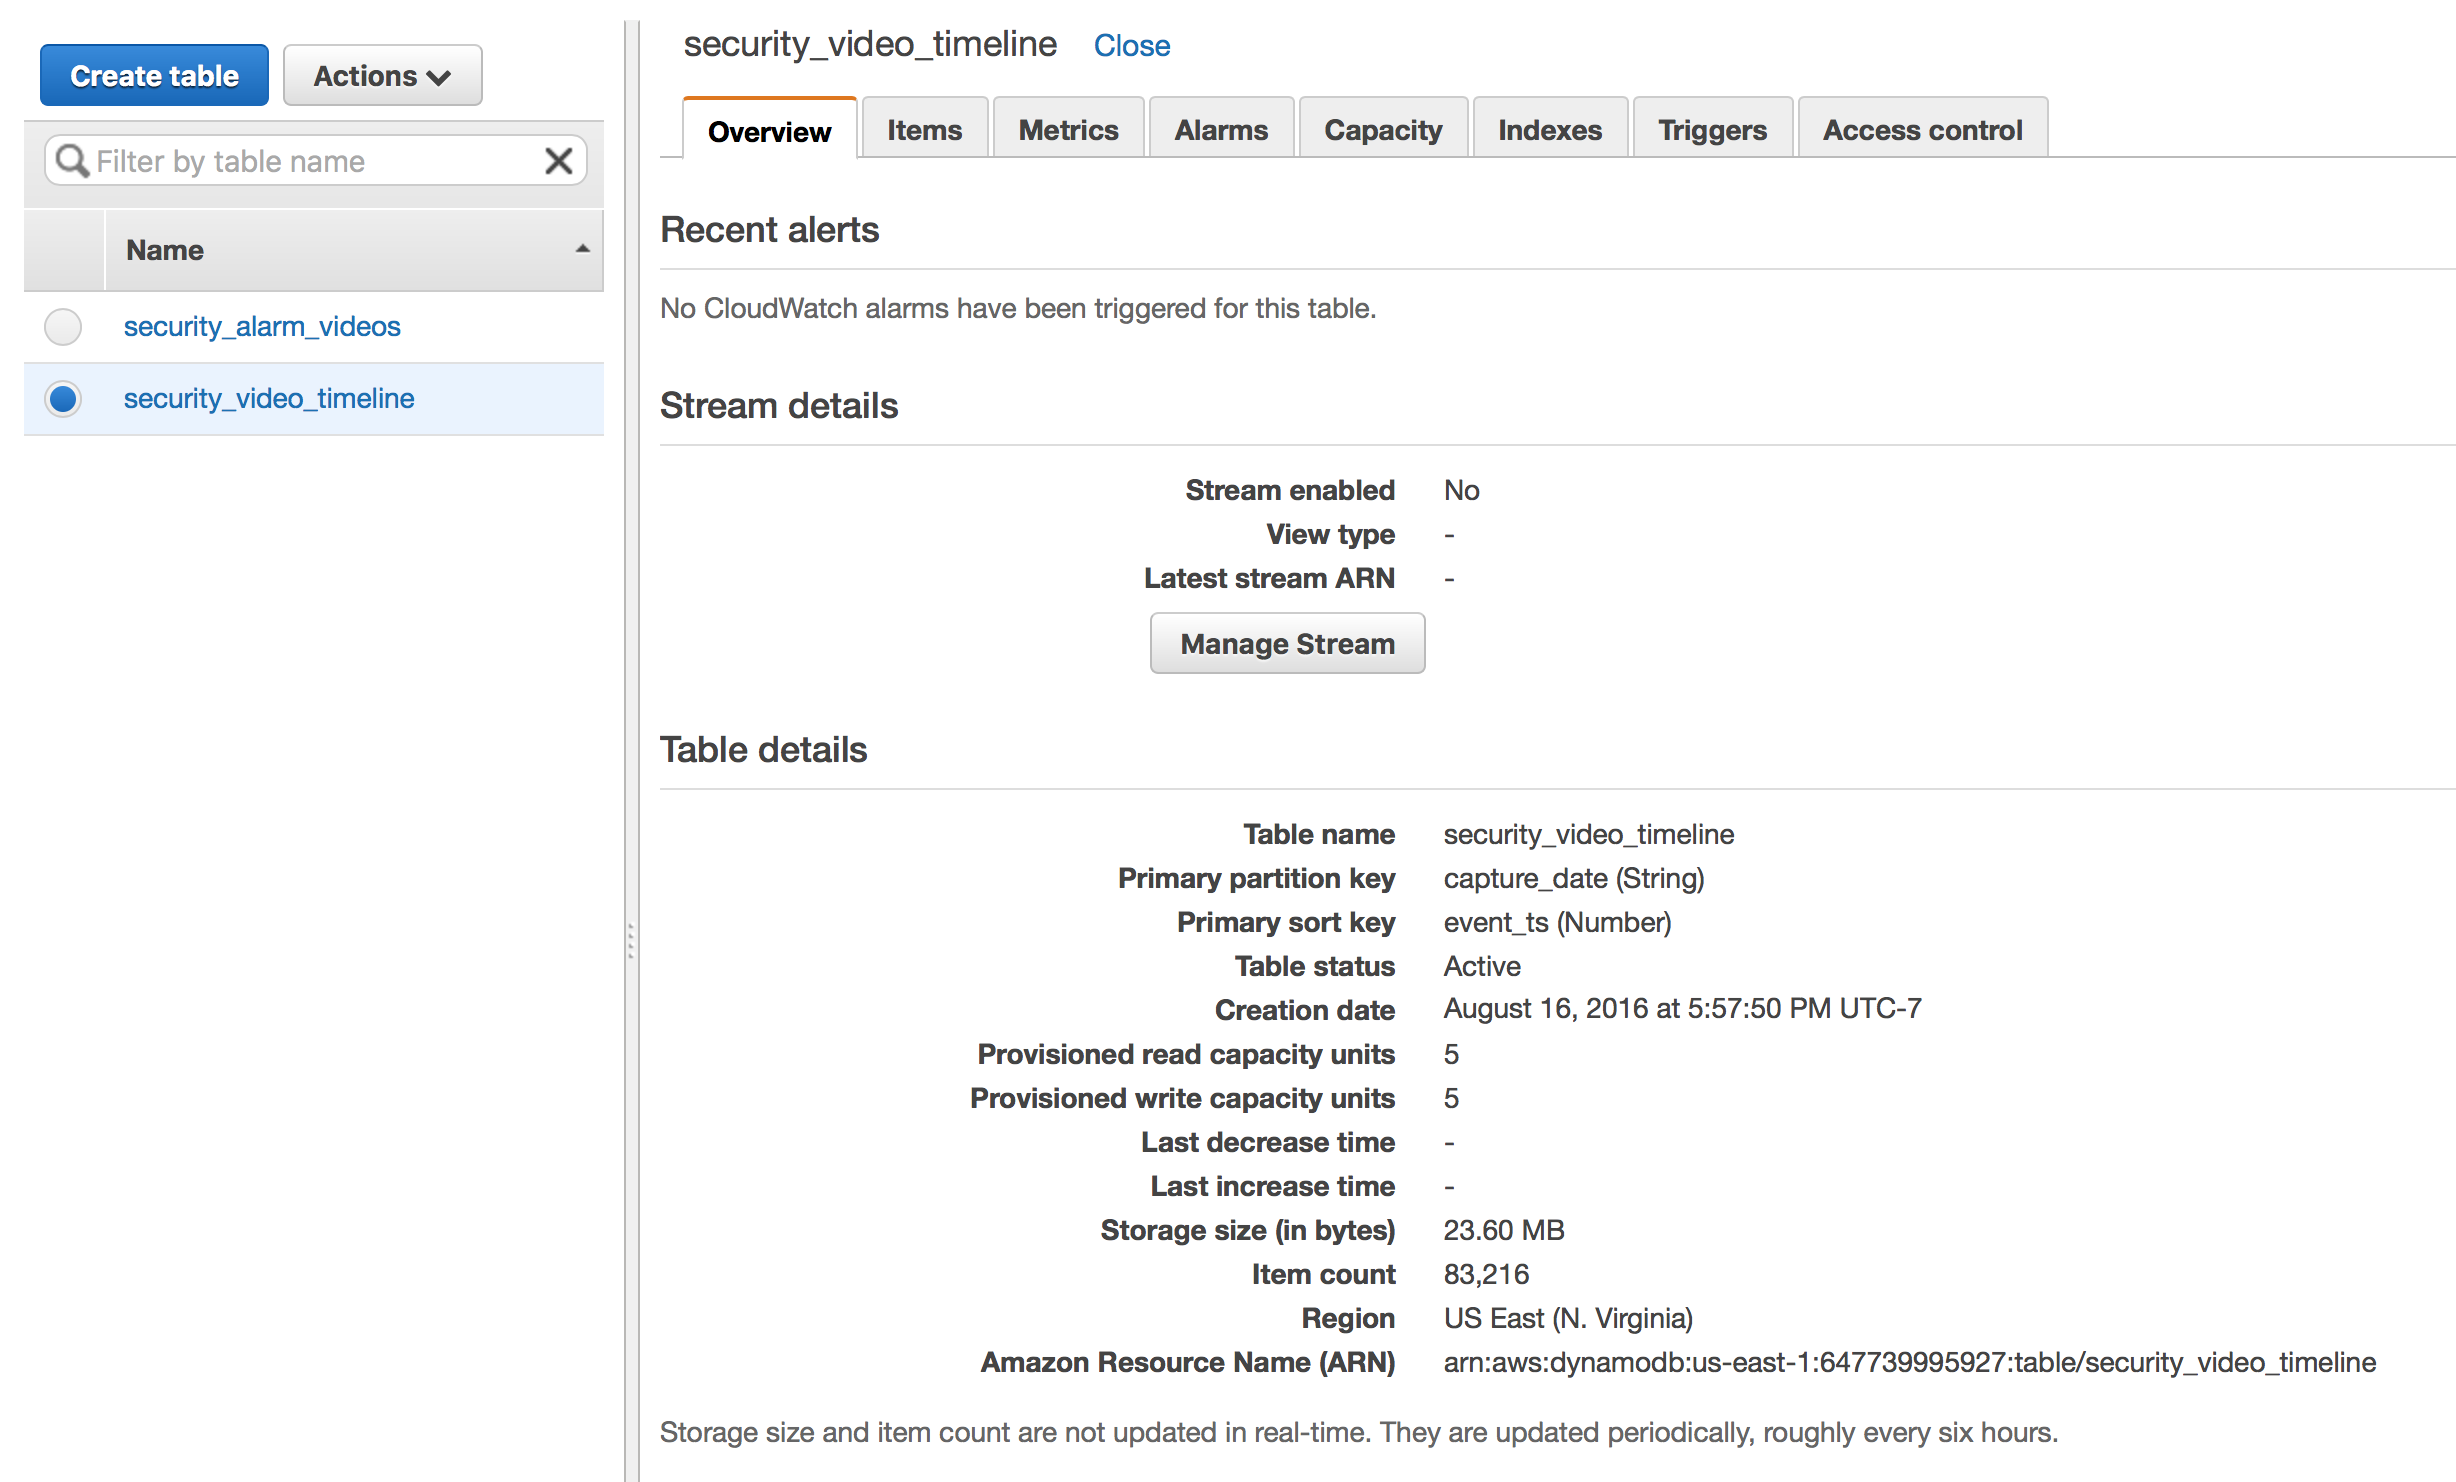
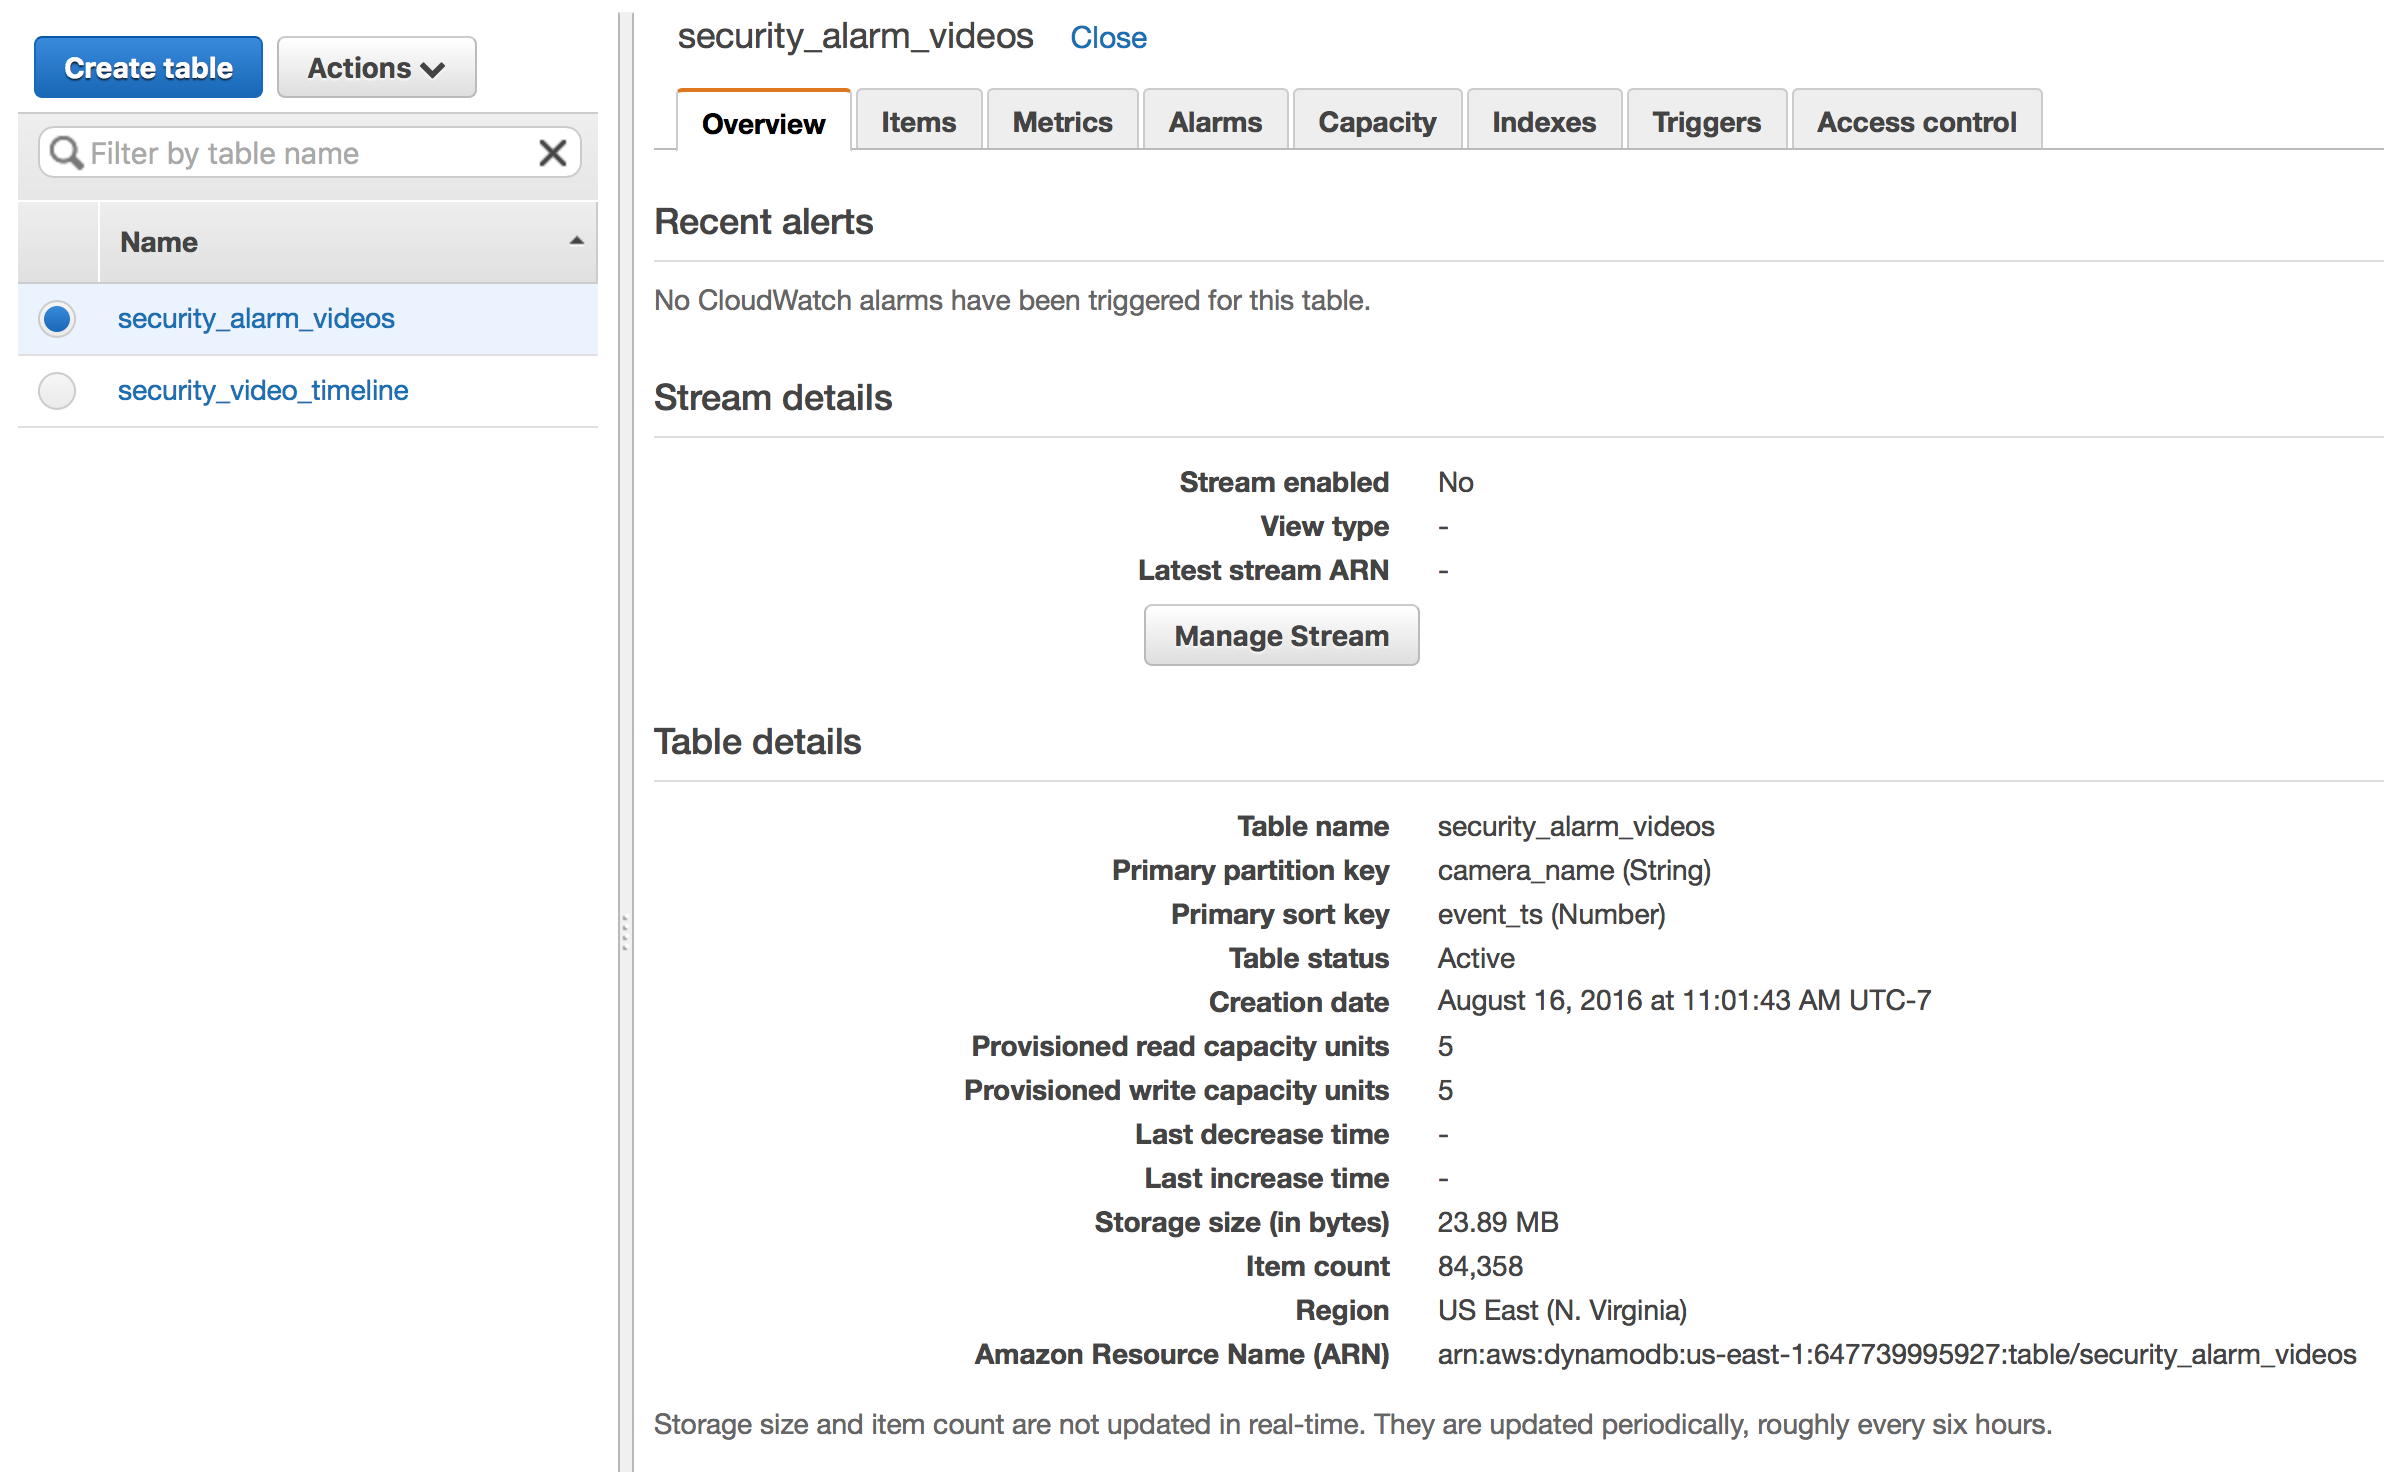
- security_alarm_videos with partition key camera_name and sort key event_ts
- security_video_timeline with partition key capture_date and sort key event_ts
The application needs two tables with different partition keys to enable viewing an ordered set of events by camera – security_alarm_videos – and by time without regard for the camera – security_video_timeline.
I won’t go into detail about how DynamoDB works – but suffice it to say that in order to satisfy both these use cases we need both tables.
Configured your DynamoDB tables should look like this:
IAM Configuration
IAM provides security for AWS. In order to allow your Lambda function (created next) access to the S3 bucket and DynamoDB tables we will need a role allowed to perform the required actions.
Our Lambda function will need a single role with permissions to:
- Read from our DynamoDB tables
- Write to our DynamoDB Tables
- Create CloudWatch logs
In the IAM console create a new role – I named mine lambda_s3_reader. You’ll need to create the 5 policies below and assign them to your role.
For all of the policies below you’ll want to replace the “Resource” ARN info with the ARN for your DynamoDB table. The ARN can be found by opening the DynamoDB console and selecting the table.
Policy #1: Read security_alarm_videos
{
    "Version": "2012-10-17",
    "Statement": [
        {
            "Sid": "GetOnSecurityAlarmVideos",
            "Effect": "Allow",
            "Action": [
                "dynamodb:GetItem",
                "dynamodb:BatchGetItem",
                "dynamodb:Query"
            ],
            "Resource": "arn:aws:dynamodb:!!Your ARN Info!!:table/security_alarm_videos"
        }
    ]
}
Policy #2: Write security_alarm_videos
{
    "Version": "2012-10-17",
    "Statement": [
        {
            "Sid": "PutUpdateDeleteOnSecurityAlarmVideos",
            "Effect": "Allow",
            "Action": [
                "dynamodb:PutItem",
                "dynamodb:UpdateItem",
                "dynamodb:DeleteItem"
            ],
            "Resource": "arn:aws:dynamodb:!!Your ARN Info!!:table/security_alarm_videos"
        }
    ]
}
Policy #3: Read security_video_timeline
{
    "Version": "2012-10-17",
    "Statement": [
        {
            "Sid": "GetOnSecurityAlarmVideos",
            "Effect": "Allow",
            "Action": [
                "dynamodb:GetItem",
                "dynamodb:BatchGetItem",
                "dynamodb:Query"
            ],
            "Resource": "arn:aws:dynamodb:!!Your ARN Info!!:table/security_video_timeline"
        }
    ]
}
Policy #4: Write security_video_timeline
{
    "Version": "2012-10-17",
    "Statement": [
        {
            "Sid": "PutUpdateDeleteOnSecurityAlarmVideos",
            "Effect": "Allow",
            "Action": [
                "dynamodb:PutItem",
                "dynamodb:UpdateItem",
                "dynamodb:DeleteItem"
            ],
            "Resource": "arn:aws:dynamodb:!!Your ARN Info!!:table/security_video_timeline"
        }
    ]
}
Policy #5: Write CloudWatch Logs
{
    "Version": "2012-10-17",
    "Statement": [
        {
            "Effect": "Allow",
            "Action": "logs:CreateLogGroup",
            "Resource": "arn:aws:logs:!!Your ARN Info!!:*"
        },
        {
            "Effect": "Allow",
            "Action": [
                "logs:CreateLogStream",
                "logs:PutLogEvents"
            ],
            "Resource": [
                "arn:aws:logs:!!Your ARN Info!!:/aws/lambda/security_cam_video_added:*"
            ]
        }
    ]
}
Policy Notes:
There are a multitude of ways to structure policies. For example, I could have create a single read/write DynamoDB policy per table – decreasing the number of policies needed for this role by 2. However, I’ll need granular read only permissions later when creating the REST API Lambda functions. Given that I chose to create more granular policies.
I did not cover the creation of the CloudWatch log stream – in most cases Lambda will create this and add the policy to the role assigned.
Once your role is created with the 5 roles above assigned you can move on to creating the Lambda function.
Lambda Function Creation
When creating a new Lambda function you can leverage one of the 51 pre-packaged templates. In this case you’ll select the Blank Template – since you’ll be using the code I’ve open sourced on GitHub.
The next step is selecting a trigger for your function:
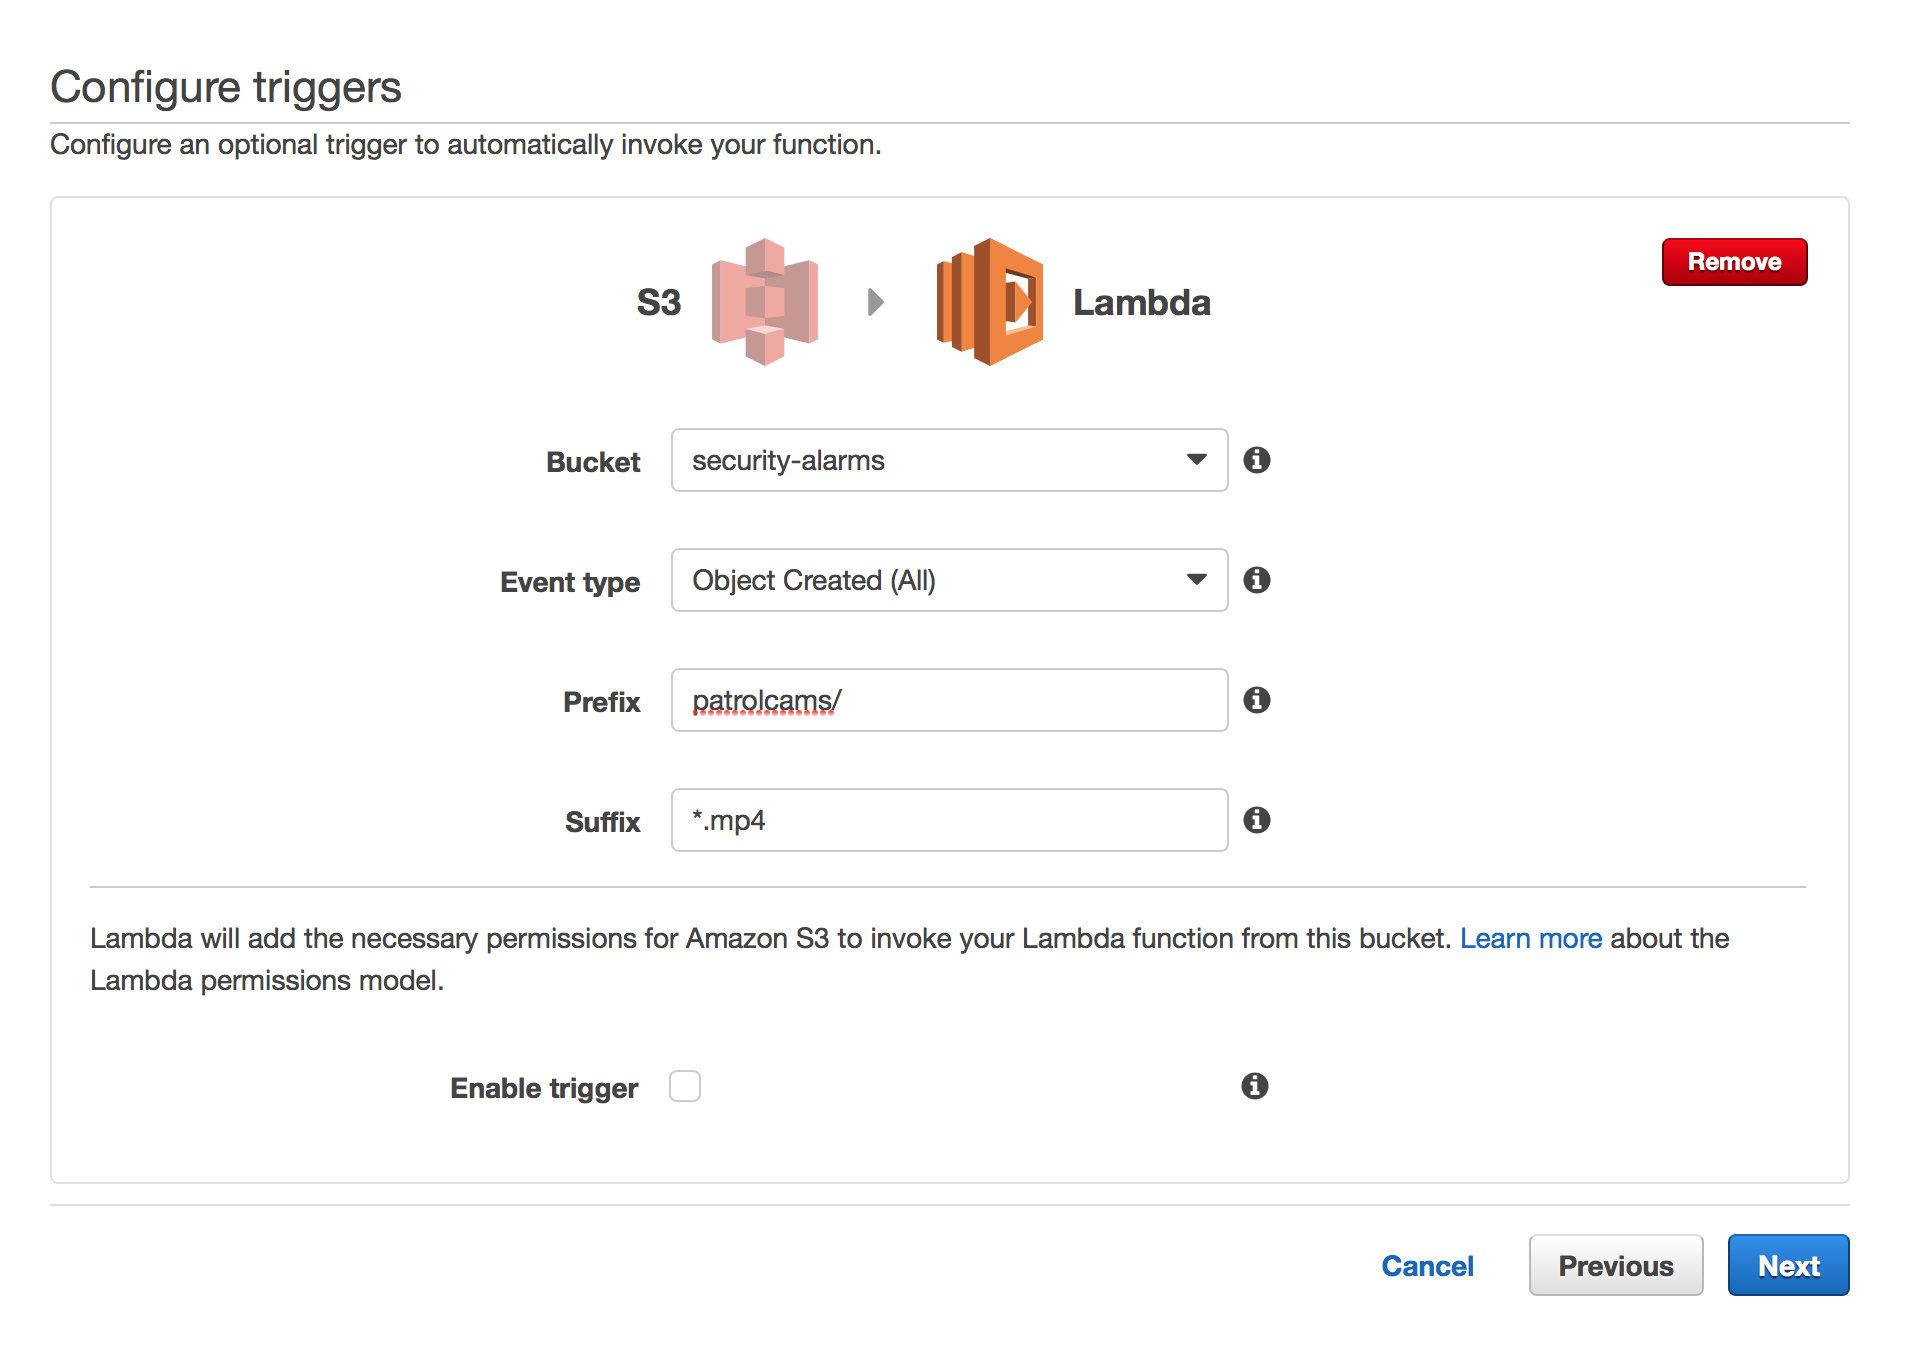
You can see that S3 has been selected, we’ve chosen the bucket we are putting the images and videos in as well as the folder in Prefix.
Last but not least, we set the trigger to only execute when the file is a video – denoted by the .mp4 extension.
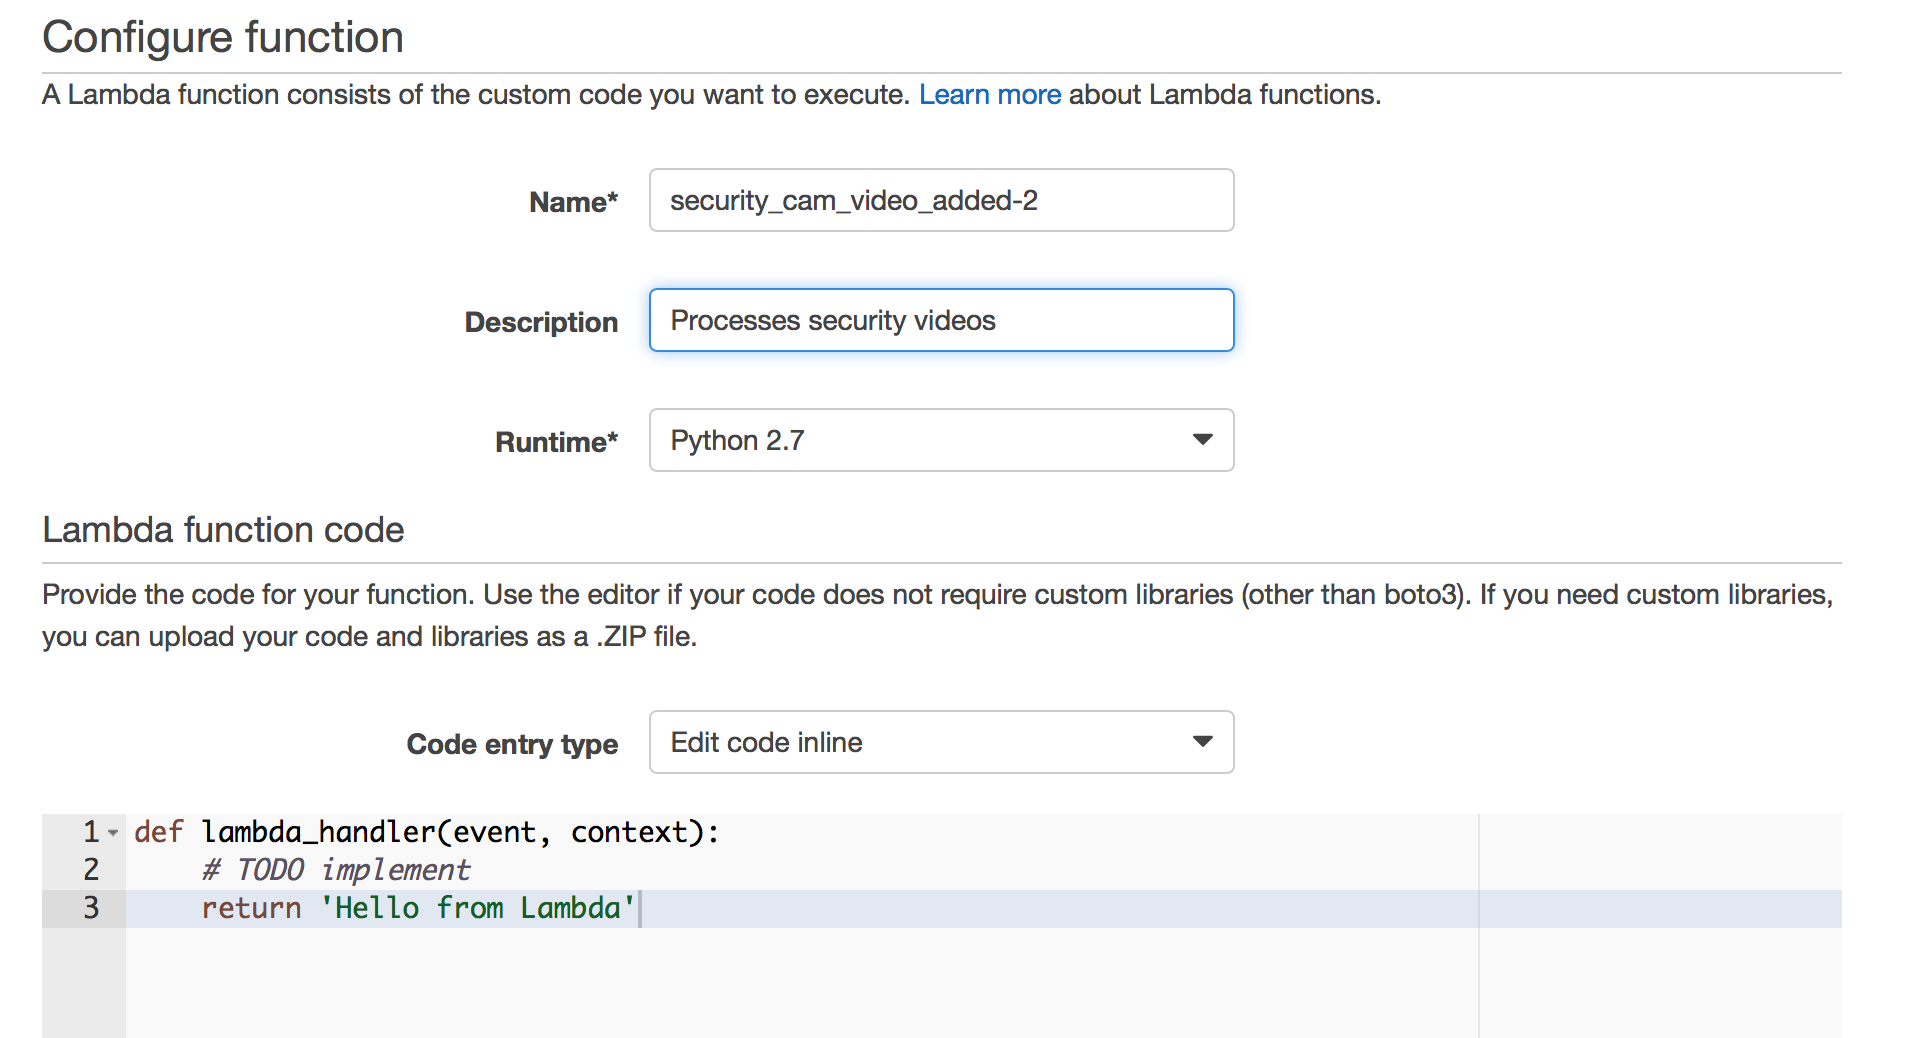
On this screen you’ll give your function a name and description, select the Python 2.7 runtime and paste in the function code found in GitHub. We will come back to this code in just a moment.
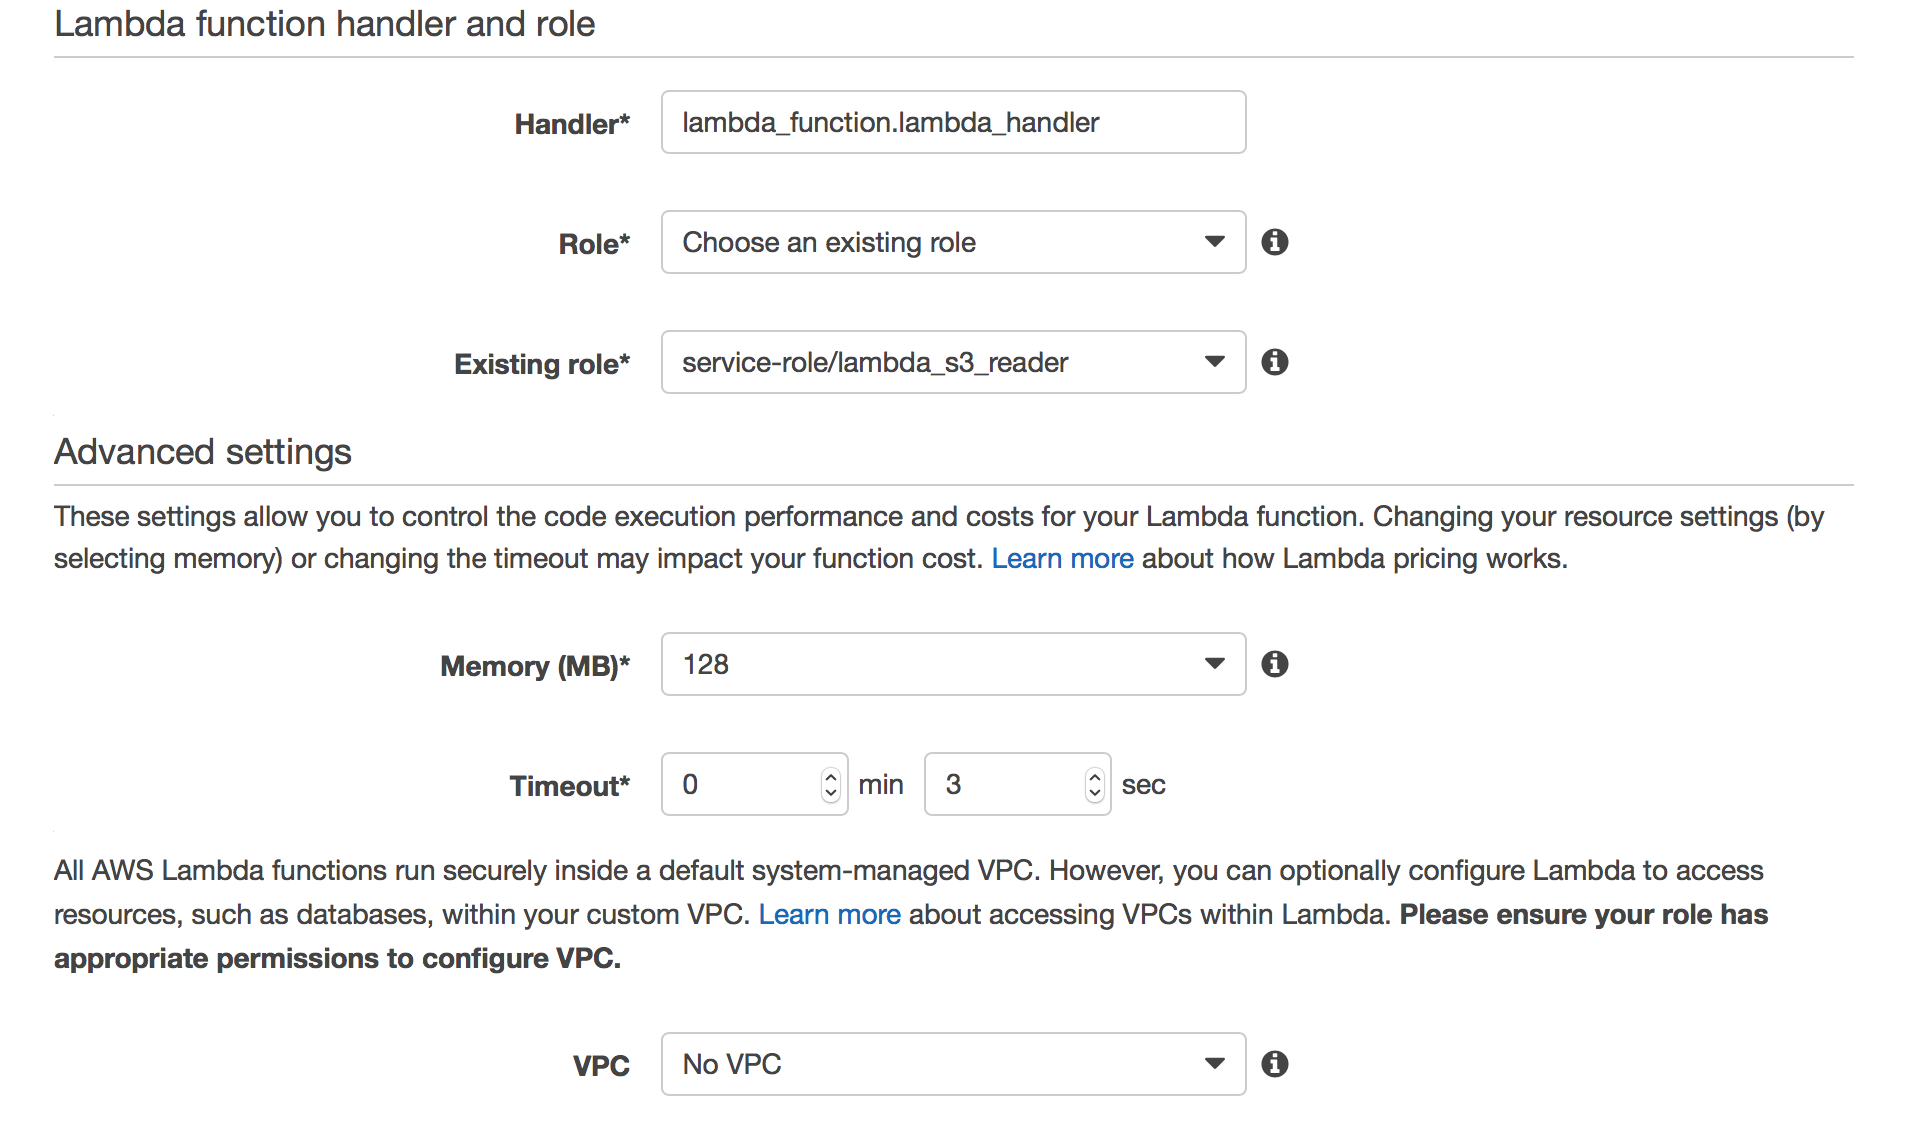
Now we can take advantage of all that work in IAM – select “Choose and existing role” and select the role created earlier.
In the advanced settings I would advise giving your function more execution time – 12 to 14 seconds should be sufficient for testing/debugging. In our case (serverless) we do not need our Lambda function to connect to any EC2 instances. If you do require that select the VPC those instances reside in.
Hit “Next” and “Create Function” and you have your first Lambda Function.
Testing Your Lambda Function
The Lambda console provides some basic tooling to test your function. To configure and execute a test of the function you select the “Actions” button
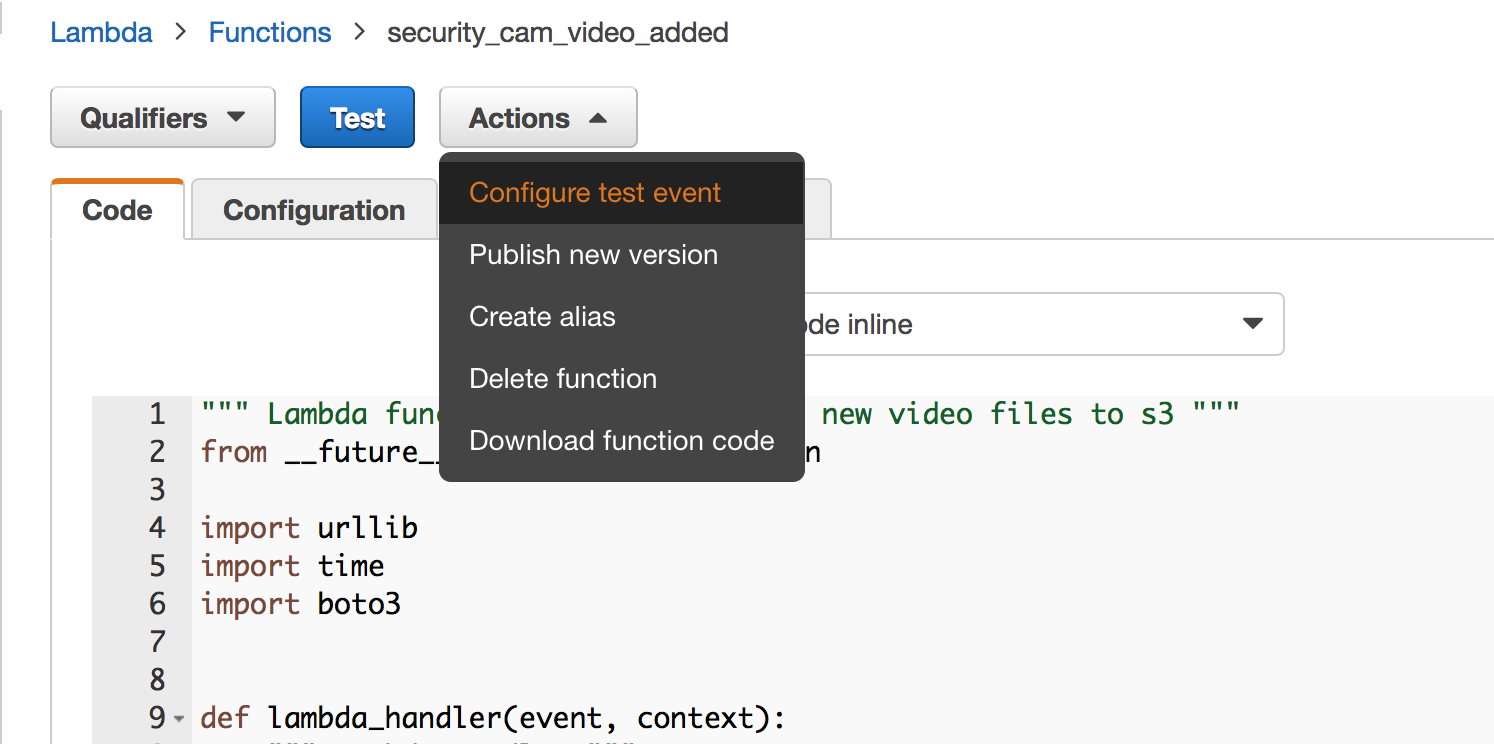
For the “Sample event template” choose “s3 Put”.
We need to make a slight modification to the template to ensure our Lambda function has a S3 object it recognizes. In the template find the S3 section and replace it with the following:
"s3": {
        "configurationId": "testConfigRule",
        "object": {
          "eTag": "0123456789abcdef0123456789abcdef",
          "sequencer": "0A1B2C3D4E5F678901",
          "key": "patrolcams/backyard/2016-10-19/Hour-16/record/MDalarm_20161018_113706.mp4",
          "size": 1024
        },
This assumes you haven’t made any changes to the default S3 bucket/object path described in this post.
Click “Save and test” and the test will be run. If everything goes as it should you should see a block like this below the function:

You can also verify the DynamoDB write using the DynamoDB console as follows:
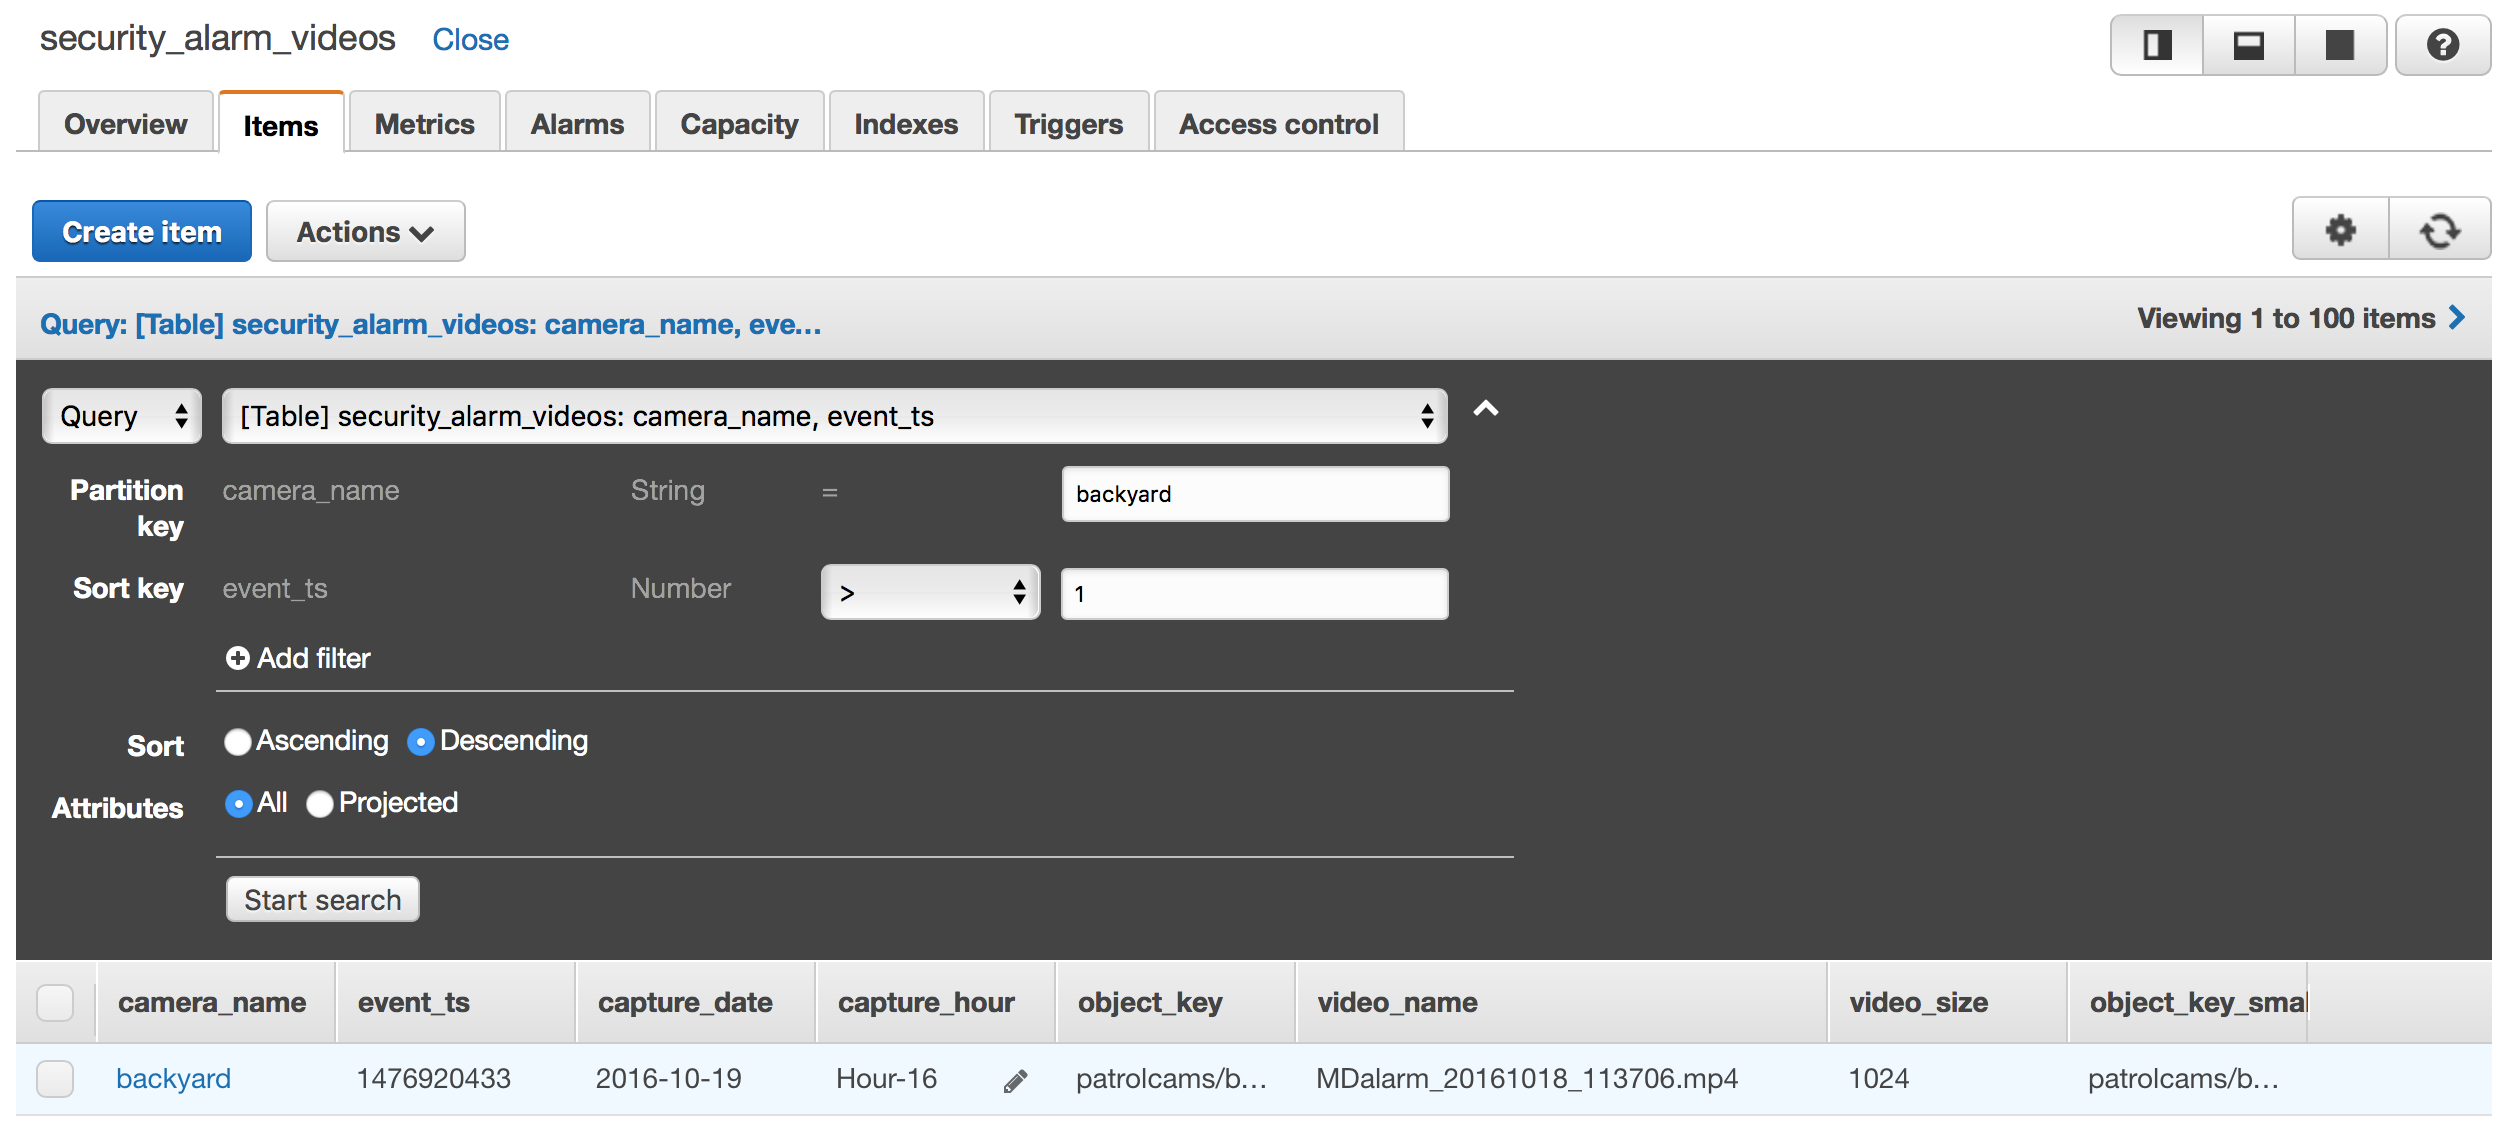
Lambda Function Code
The last part of this post is a review of the Lambda Function code itself. This section assumes a working knowledge of Python. The function can be found in GitHub here.
The entire function is less than 70 executable lines of code. All of the configuration done to get “serverless” means the functions themselves are – often – very simple.
The function – broadly – does 3 things:
- Reads the S3 PUT metadata to understand what file was uploaded
- OPTIONALY: Transcode the video to a lower resolution and bit rate
- This capability is NOT covered in this post – it will be discussed in a subsequent post in the series.
- Write a record to each of the two DynamoDB tables we created above.
Later, our REST API Lambda functions will read from those tables to enable our web application to review and play the videos.
S3 Metadata Parsing
    do_transcode = False
    # print("Received event: " + json.dumps(event, indent=2))
    start_time = time.time()
    # Get the object from the event and show its content type
    key = urllib.unquote_plus(event['Records'][0]['s3']['object']['key']).encode('utf8')
    size = event['Records'][0]['s3']['object']['size']
    print("Security Video: " + key + " with size: " + str(size) + " uploaded.")
    # print("Saving Data to DynamoDB")
    object_parts = key.split("/")
    camera_name = object_parts[1]
    # print("Camera Name: " + camera_name)
This code is relatively simple – we set a flag to disable transcoding of the video, create a timestamp which allows us to log the total run time, and extract the key for the object from the metadata and parse it for some key attributes – e.g., camera_name.
To Transcode or not to transcode…
    if "-small.mp4" not in key:

        small_vid_key = key.replace(".mp4", "-small.mp4")

        if do_transcode:
In this section we explicitly skip processing of the transcoded file. This is because when ElasticTranscoder creates the new file it adds it to S3 – which generates a PUT – which causes our Lambda function to execute.
This is a valuable lesson – if you have a Lambda function that writes to S3 be careful you do not end up creating an infinite loop (or technically recursion? I guess it is a function that calls itself… but not in the same execution context…).
Lastly we look at the do_transcode flag to determine if we execute the transcode of the file. As noted – I won’t describe that capability in this post.
        dyndb = boto3.resource('dynamodb')
        vid_table = dyndb.Table('security_alarm_videos')
        vid_timeline_table = dyndb.Table('security_video_timeline')
        save_data = {'camera_name': camera_name,
                     'video_size': size,
                     'video_name': object_parts[5],
                     'capture_date': object_parts[2],
                     'capture_hour': object_parts[3],
                     'event_ts': int(time.time()),
                     'object_key': key,
                     'object_key_small': small_vid_key
                    }

        vid_table.put_item(Item=save_data)
        vid_timeline_table.put_item(Item=save_data)

        print("Processing for " + key + " completed in: " + str(time.time() - start_time) +
              " seconds.")
The final section of the code creates a connection to both DynamoDB tables, creates a dictionary with the parsed S3 metadata, and finally adds the records to the tables.
I also added logging to capture the processing time for each object.
Summary
At this point we’ve created a serverless IoT data capture and processing application. Videos are only one use case. The obvious bottleneck here is the local controller & gateway – however if each is scoped to handle a reasonable number of nodes (cameras) performance isn’t a problem. In my case a single RaspberryPI 3 Model B has supported 14+ cameras with no problem.
In the next post in the series I’ll discuss creating a REST API to access the metadata catalog being created as well as building a serverless web application to consume that REST API for catalog browsing and video playback.

3 comments