In part three of the series I discussed creating a serverless REST API – using Lambda and API Gateway – to serve the collected IoT data from the security camera devices.
In this post I will cover securing the REST API.
As a review, the image below provides an overview of the serverless web application that will be implemented using this REST API:
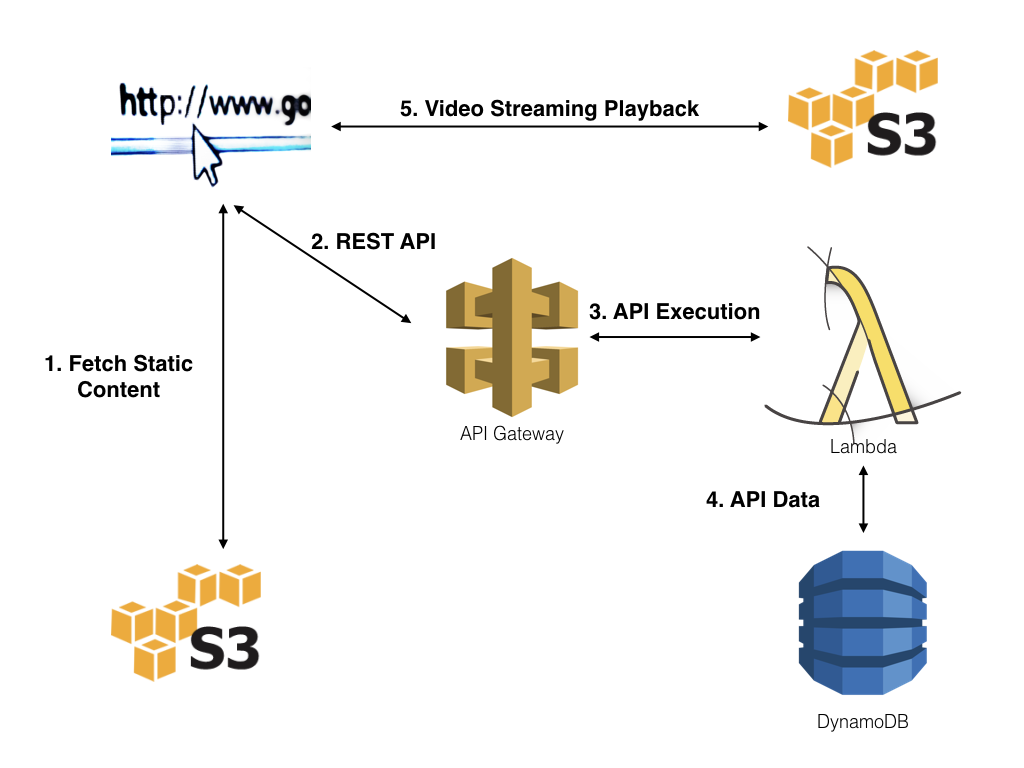
Securing the REST API
The API we created in part three needs to be secured to ensure that the videos – and the metadata about those videos – is inaccessible to API users who haven’t been granted access. As importantly, I didn’t want to inject a server to manage user accounts and rights, nor did I want to take on managing another set of user accounts.
The solution: Google Authentication API
I won’t go into significant detail in this post (I will, however, in the next) about implementing the configuration and javascript to authenticate a user with Google and obtain a user token – but suffice it to say once we have the token we can pass it to the REST API and use that to allow/disallow access.
Note: I did look at Cognito, but it seemed like overkill for my purposes.
Creating a API Gateway Custom Authenticator
This is a relatively straightforward process since we will be using a Lambda function as our custom authenticator. So, step one is the creation of another Lambda function using this code from GitHub.
Custom Authenticator Functionality
The custom authenticator does 3 things. First it gets the token sent by the client and makes a HTTP request to google to validate the token and get the user’s information:
    # Get the user info from Google for the recieved token...
    id_token = event['authorizationToken']
    google_token_helper_uri = "https://www.googleapis.com/oauth2/v3/tokeninfo?id_token=" + id_token

    result = json.loads(urllib2.urlopen(google_token_helper_uri).read())

    domain = result['hd']
    user = result['sub']
    effect = 'Deny'
It also sets the default effect to “Deny” – meaning the user will not be allowed access.
The second thing it does is compare some of the user information to a whitelist. In my case I’m granting access to everyone in the brianandkelly.ws domain.
    allowed_domain = "brianandkelly.ws"
    if domain == allowed_domain:
        effect = 'Allow'
This is very simple. This can easily be extended to have a more complex whitelist – including a dynamic one stored in DynamoDB, ActiveDirectory, OpenLDAP or any other backing store.
Third, the authenticator constructs an IAM Policy which either allows or denies access – based on the value of the effect variable – and returns that policy to API Gateway:
    respond = {
        "principalId": user,
        "policyDocument": {
            "Version": "2012-10-17",
            "Statement": [
                {
                    "Action": "execute-api:Invoke",
                    "Effect": effect,
                    "Resource": "arn:aws:execute-api:us-east-1:*:!!your api info!!*"
                }
            ]
        }
    }

    return respond
In the script itself you’ll need to replace !!your api info!! with information from the heading of the API Gateway screen:

The format is:
part in parenthesis/api name - part before parenthisis
in my case:
"Resource": "arn:aws:execute-api:us-east-1:*:7k8o0sgjli/securityvideos/*"
I won’t go into detail about creating this function (we’ve done several in the series) but here is how mine looks fully configured:
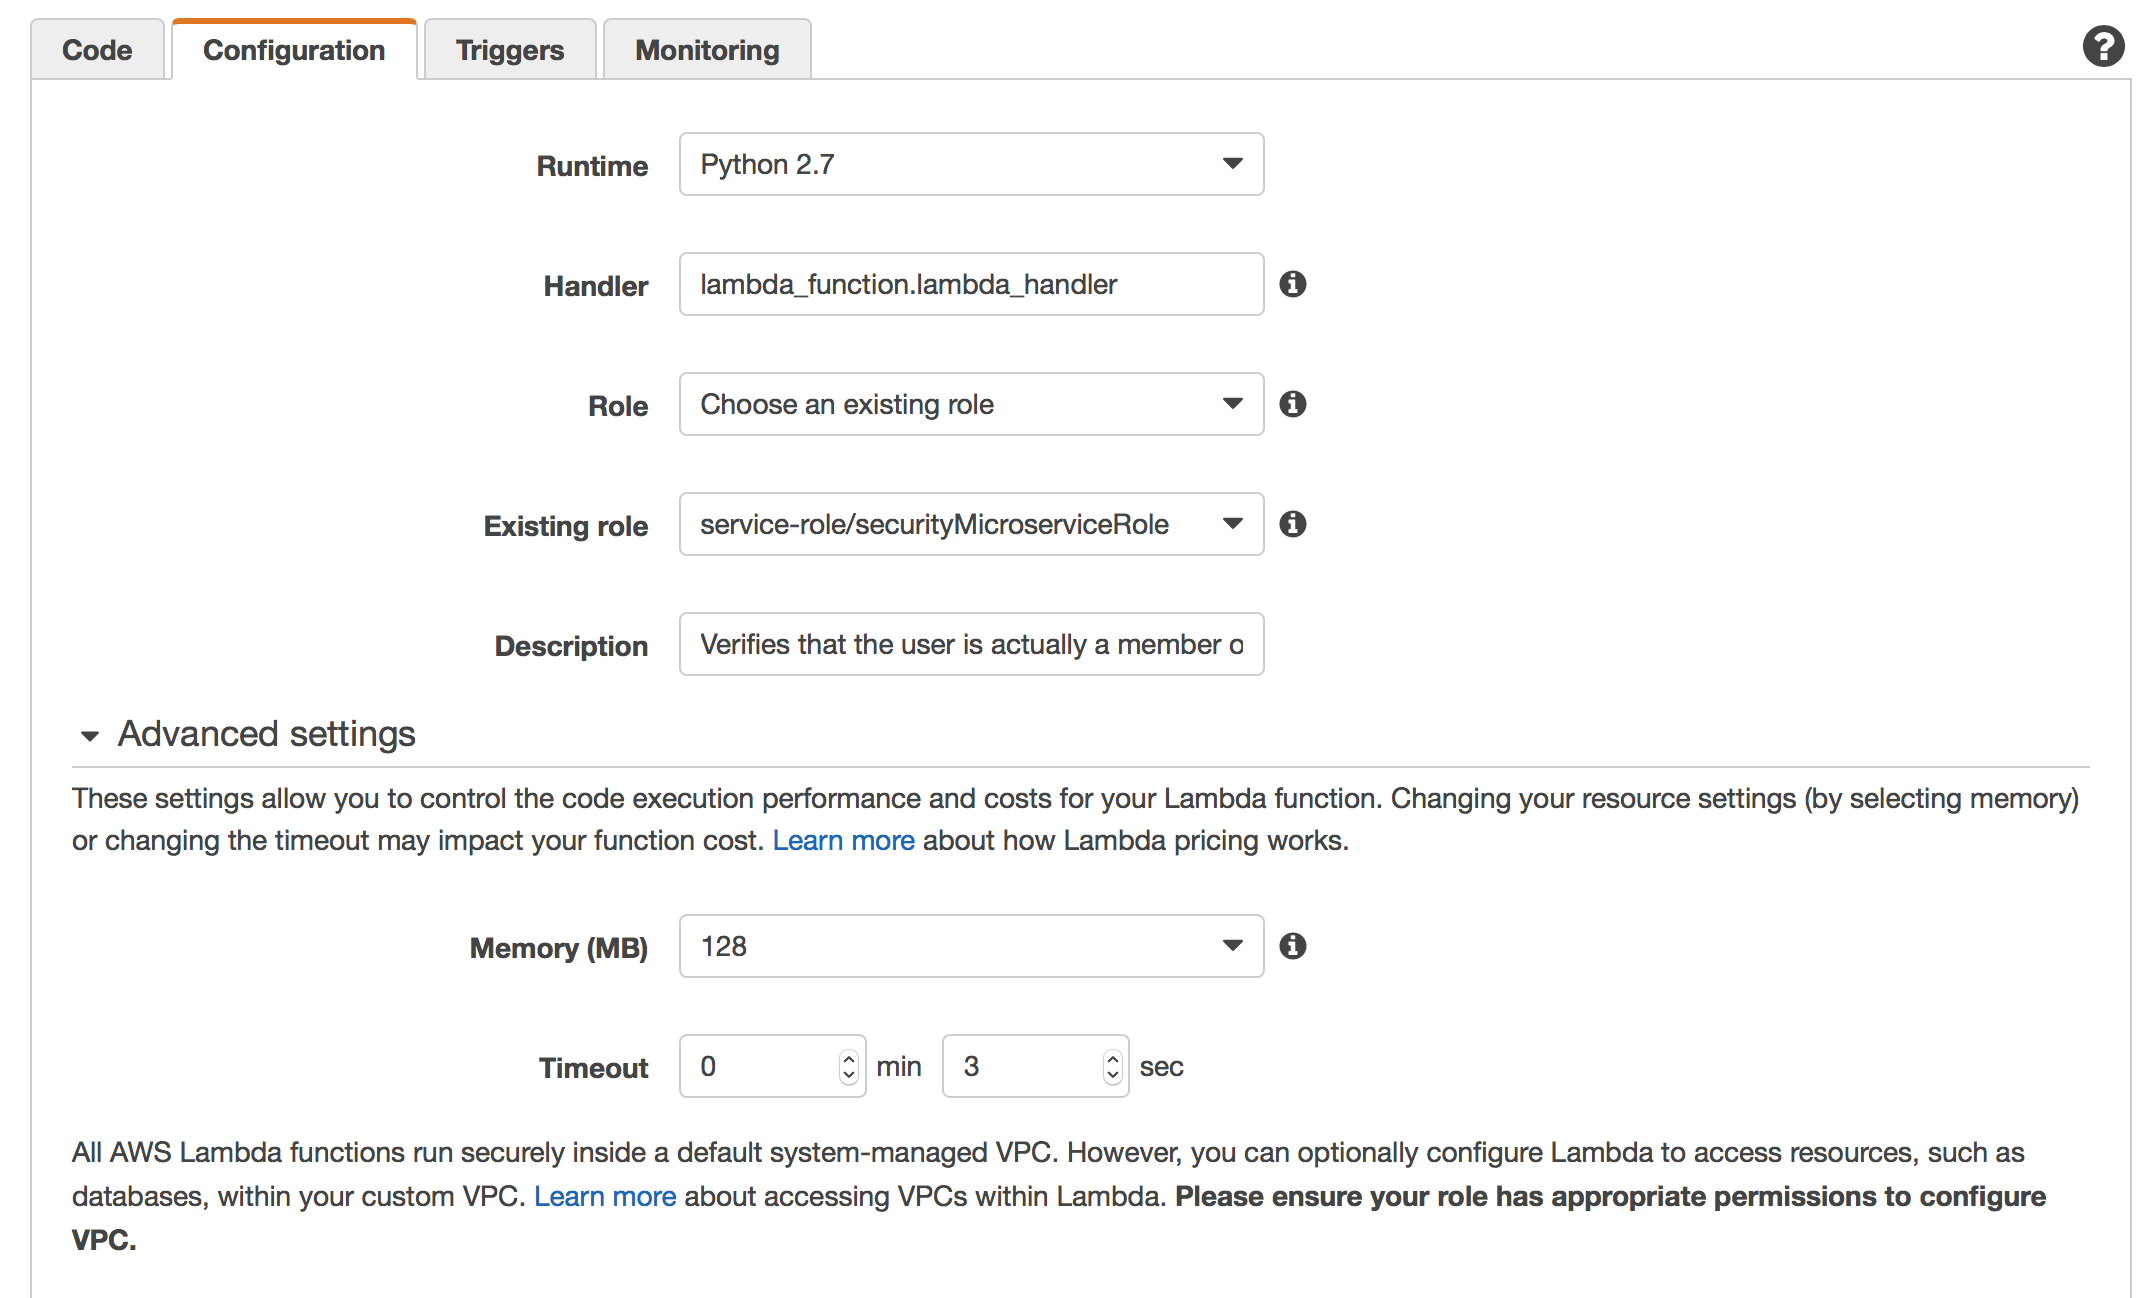
Using the existing IAM role we created for the other REST API Lambda Functions will work fine.
You should note that this Lambda Function has no Trigger – since it will be called by API Gateway once we apply the lambda function as a custom authorizer.
Applying the Custom Authenticator to your REST API
The first step is to tell API Gateway to use the Lambda Function as an Authorizer. Click on Authorizers under the API:

Now select “Create” on the right and select “Custom Authorizer”

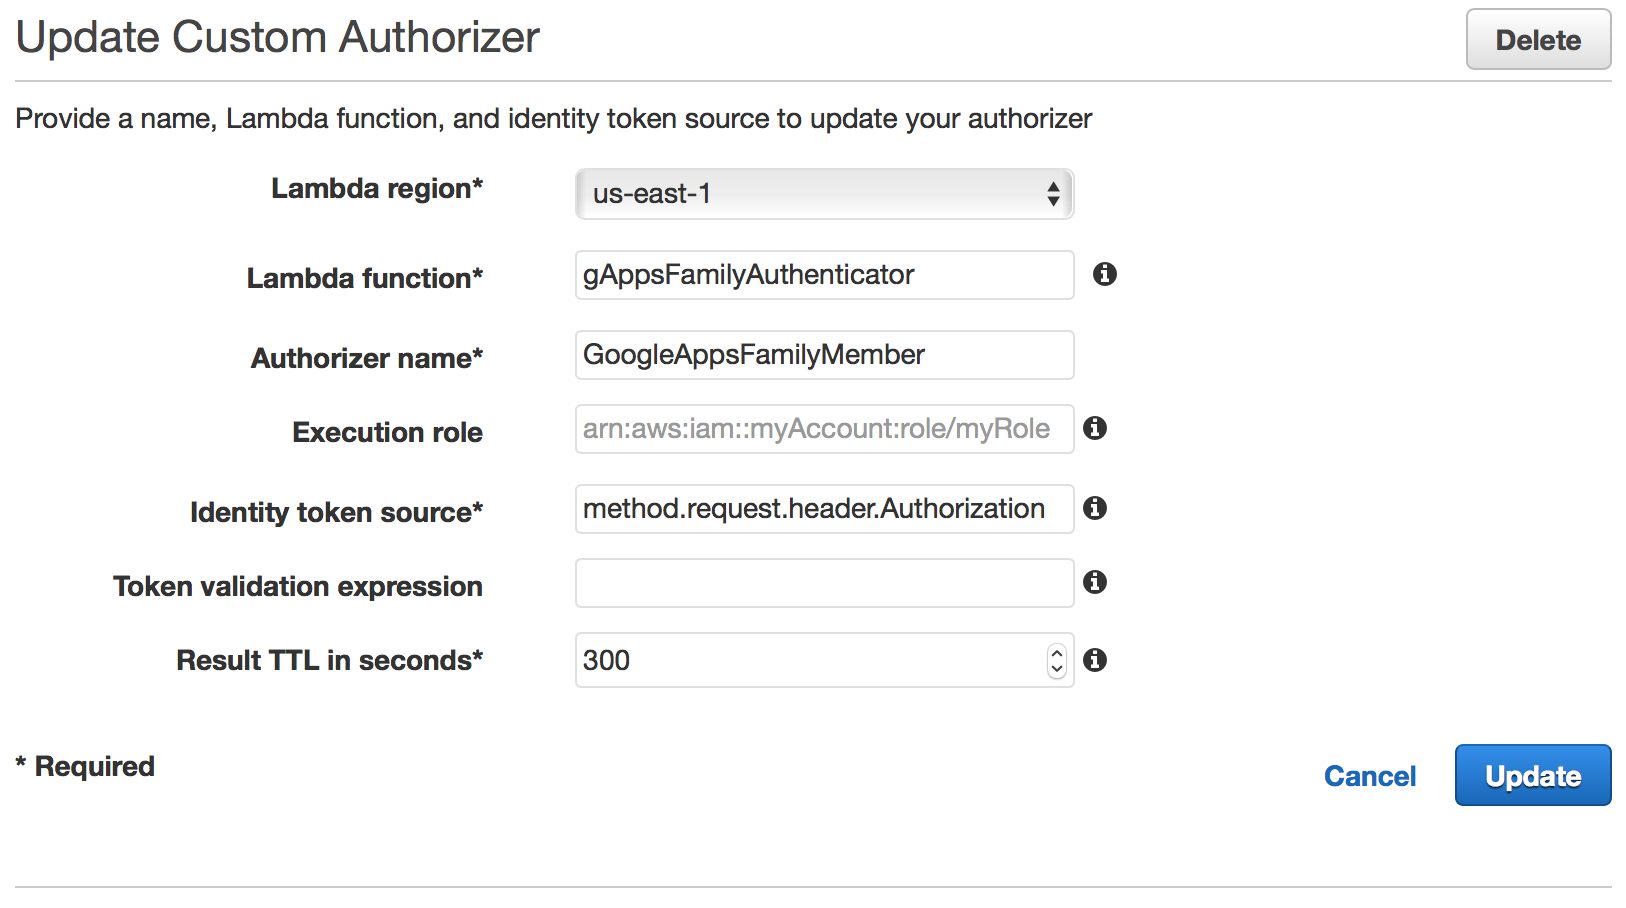
In the “Update Custom Authorizer” screen select the region your Lambda function is deployed in, the name of the function and give the authorizer a name.
You can leave the default method.request.header.Authorization value in the “Identity token source” field. We will discuss how to set the header in the next post in this series. I strongly recommend that you set “Result TTL in seconds” to a value no less than 300. This is important for both the performance of your API and to avoid sending excessive requests to Google.
Finally, you will need to apply the authenticator to all the active methods of your API (or at least the ones you want secure):
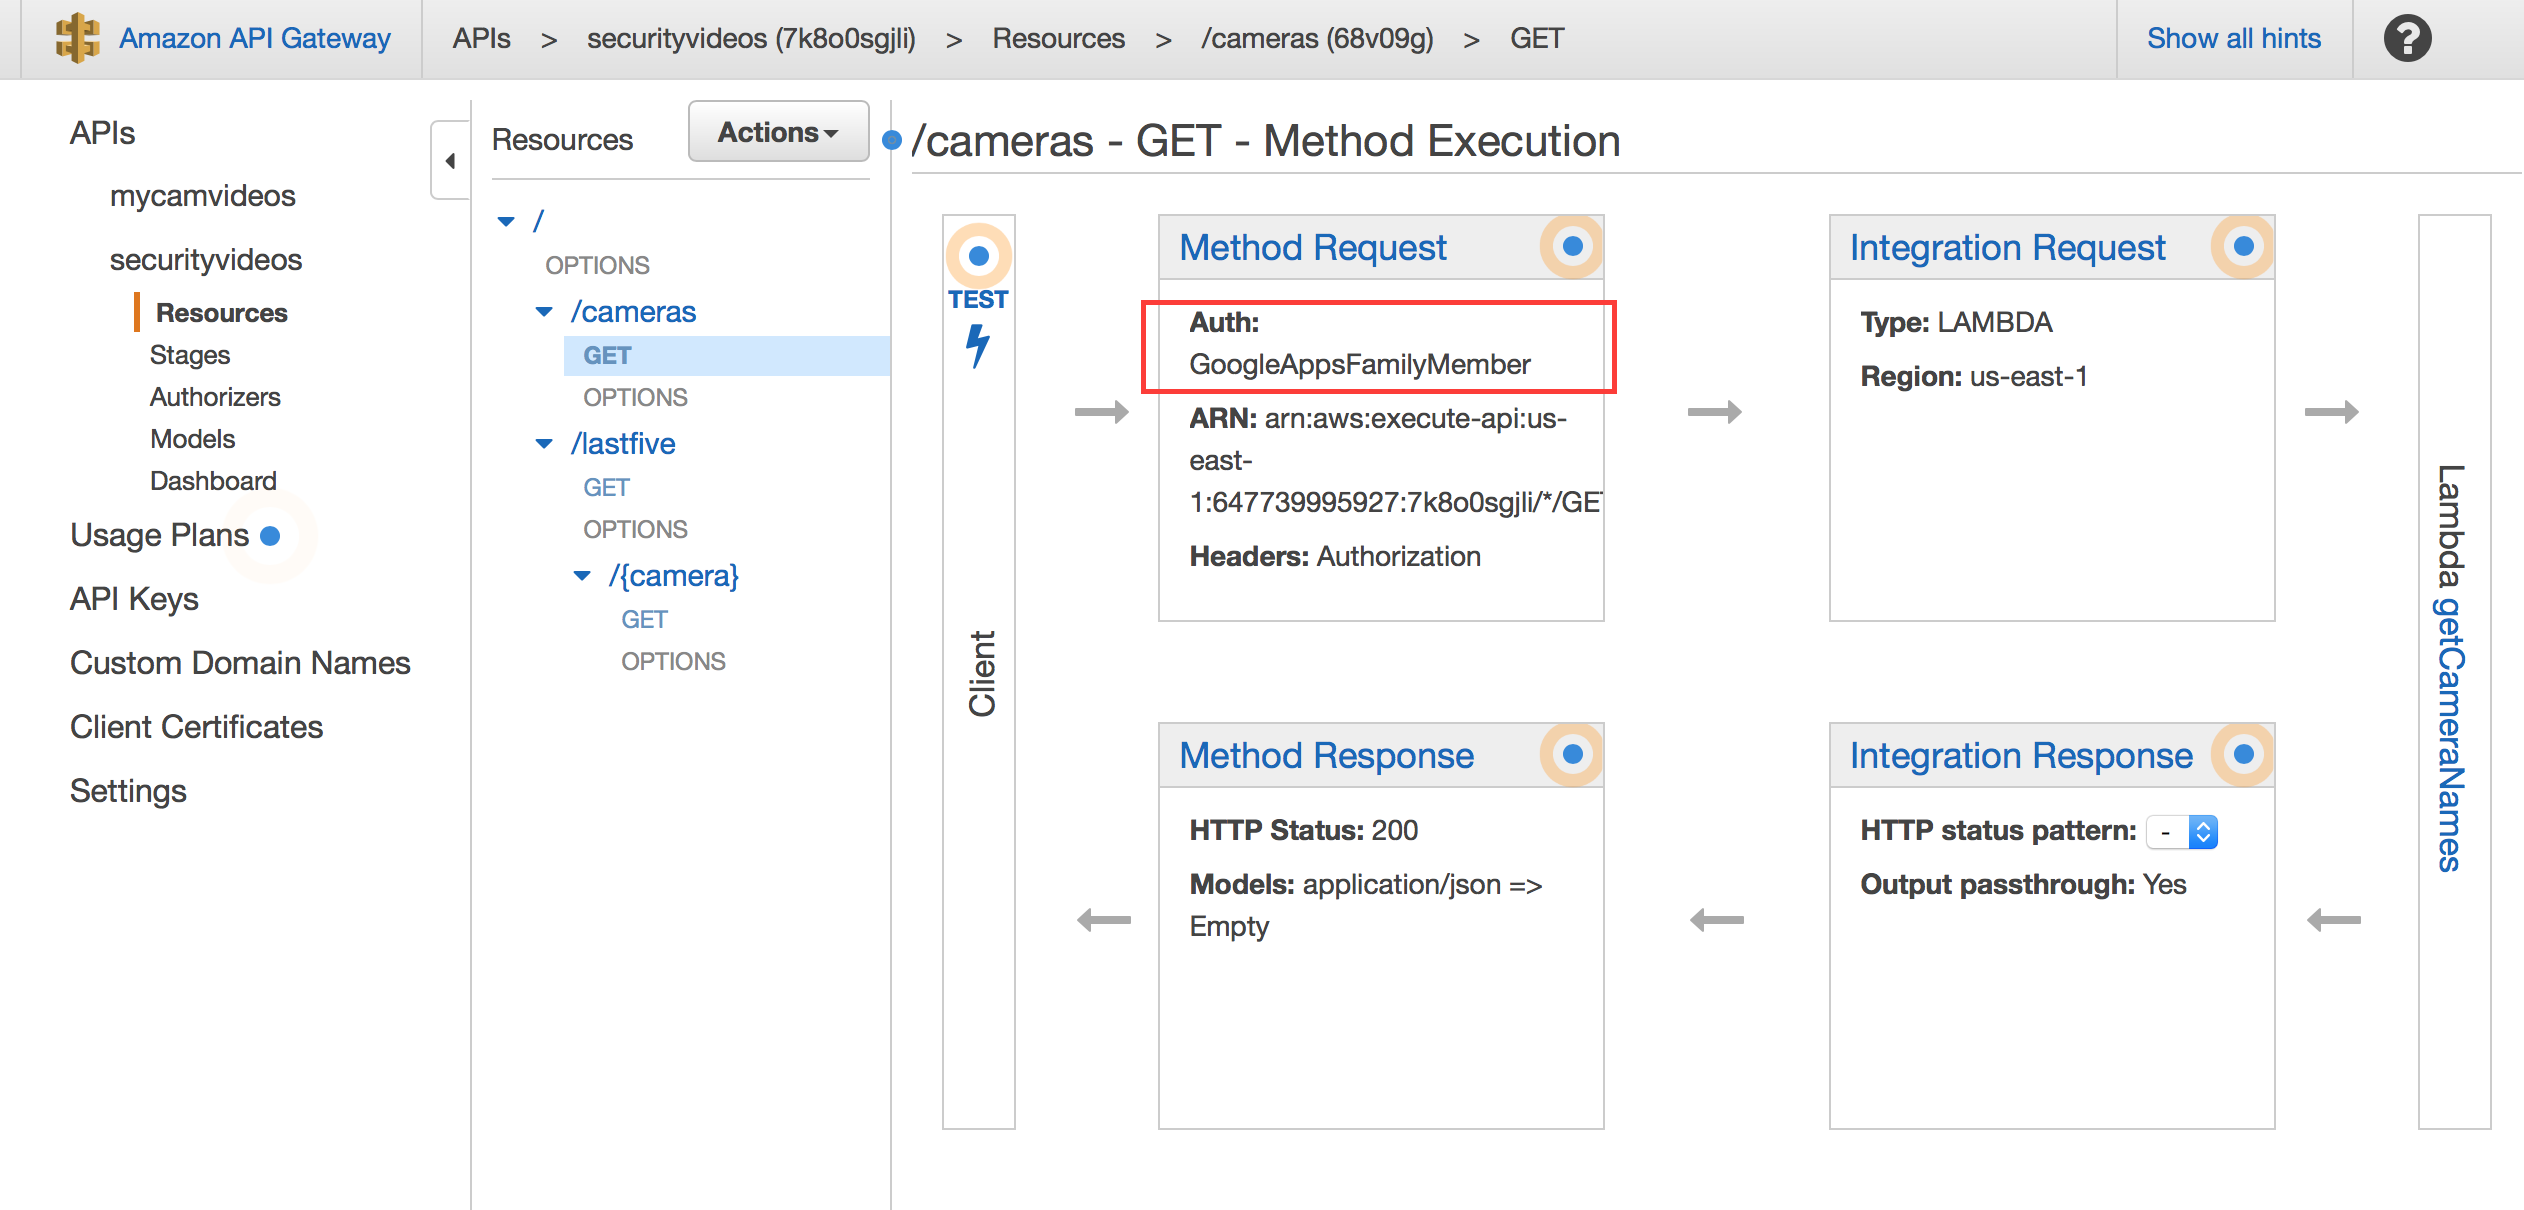
You can do that by clicking on “Method Request” and setting the authenticator as follows:
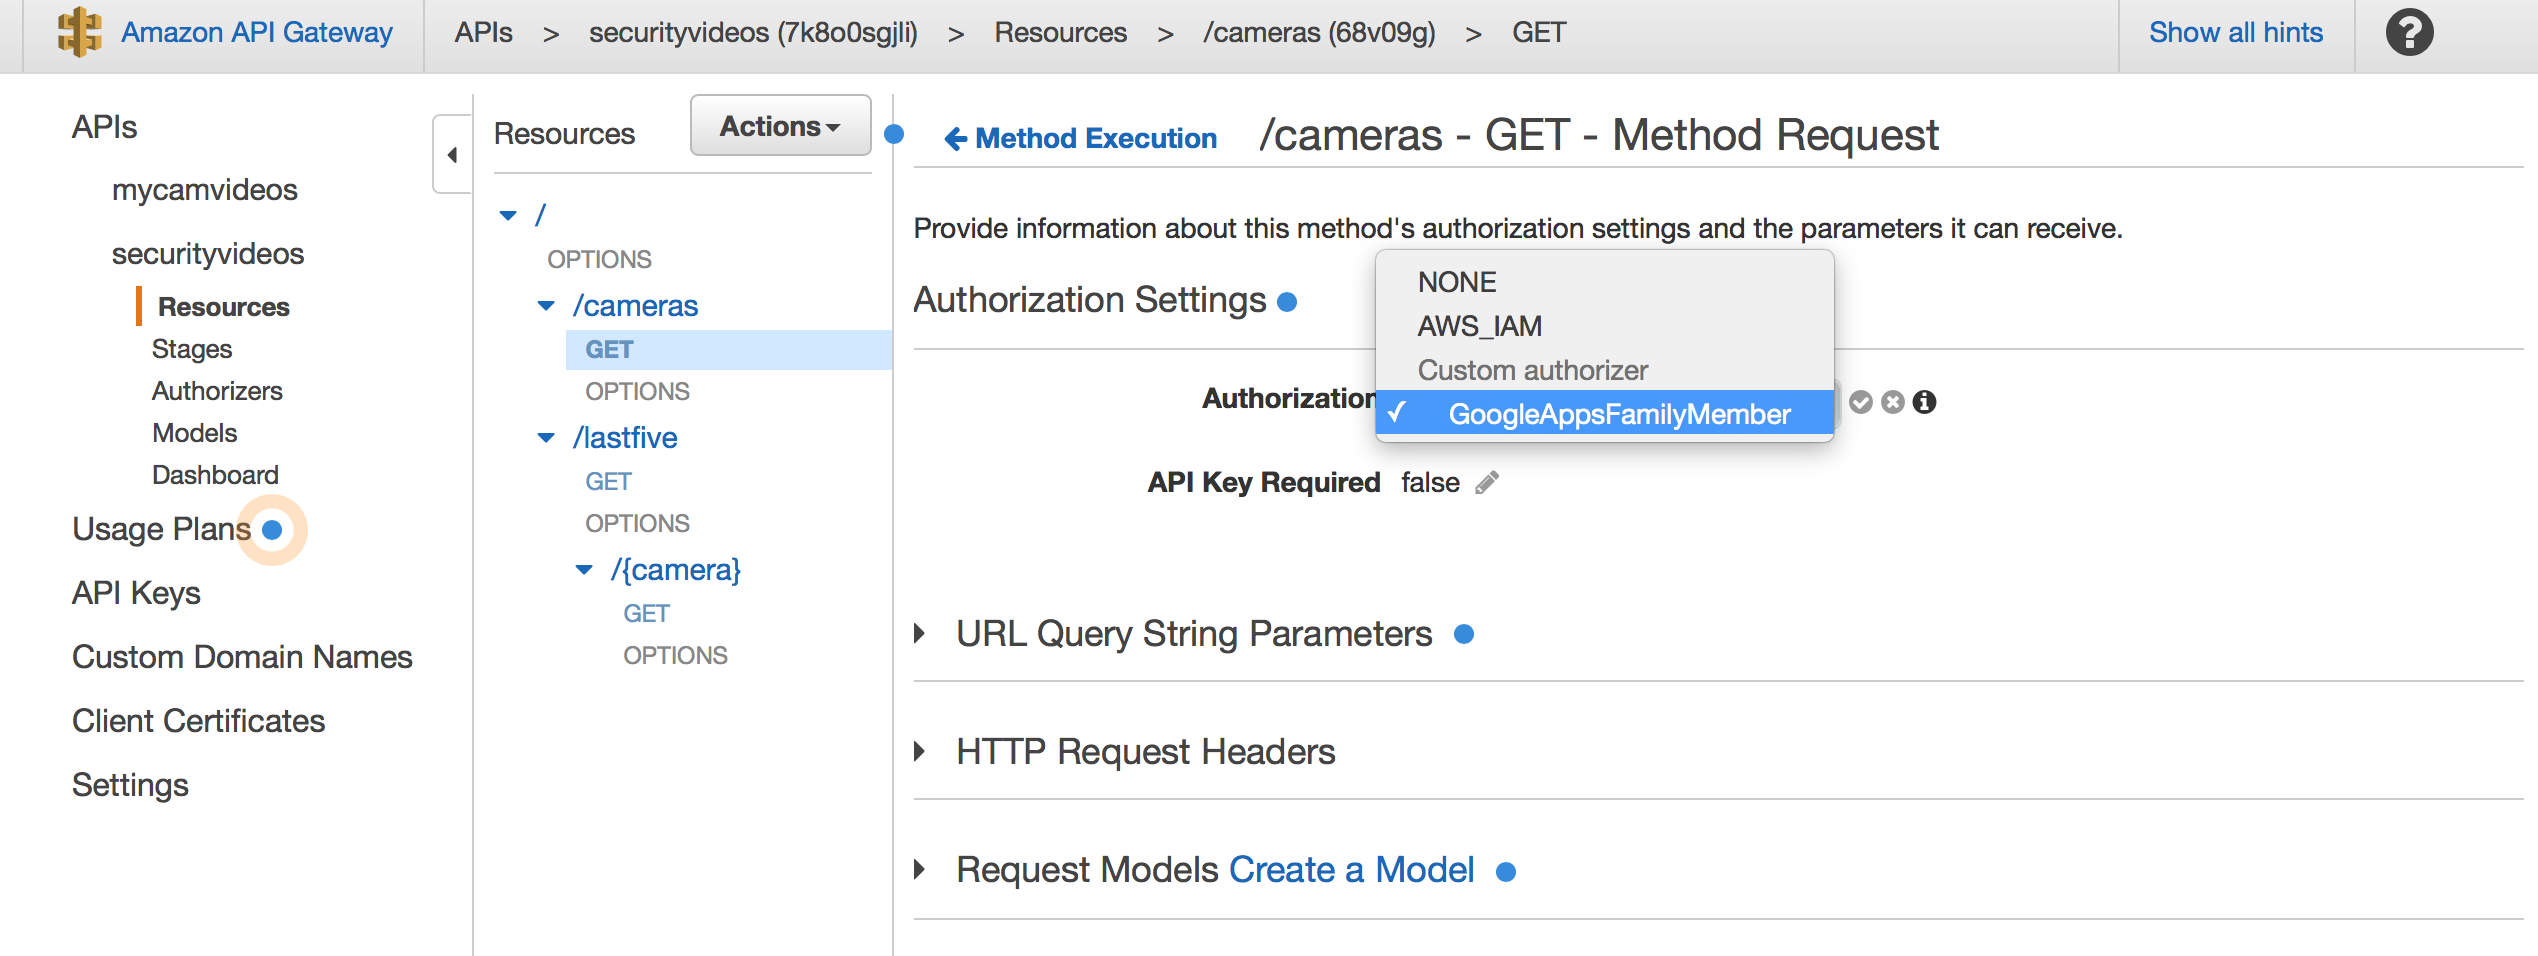
NOTE: You should NOT apply the authenticator to the OPTIONS method. That method is used for CORS and should not be secured.
Deploying the REST API
Once you’ve done that for all the resources you can deploy your API – which will make it available. API Gateway uses “Stage” to denote various types of deployments for your API. You can use these stages to have separate DEV/QA and production stages for your API.
To deploy your API select the root of the resource tree and select “Actions” -> “Deploy API”:

In the “Deploy API” dialog select “[New Stage]”:
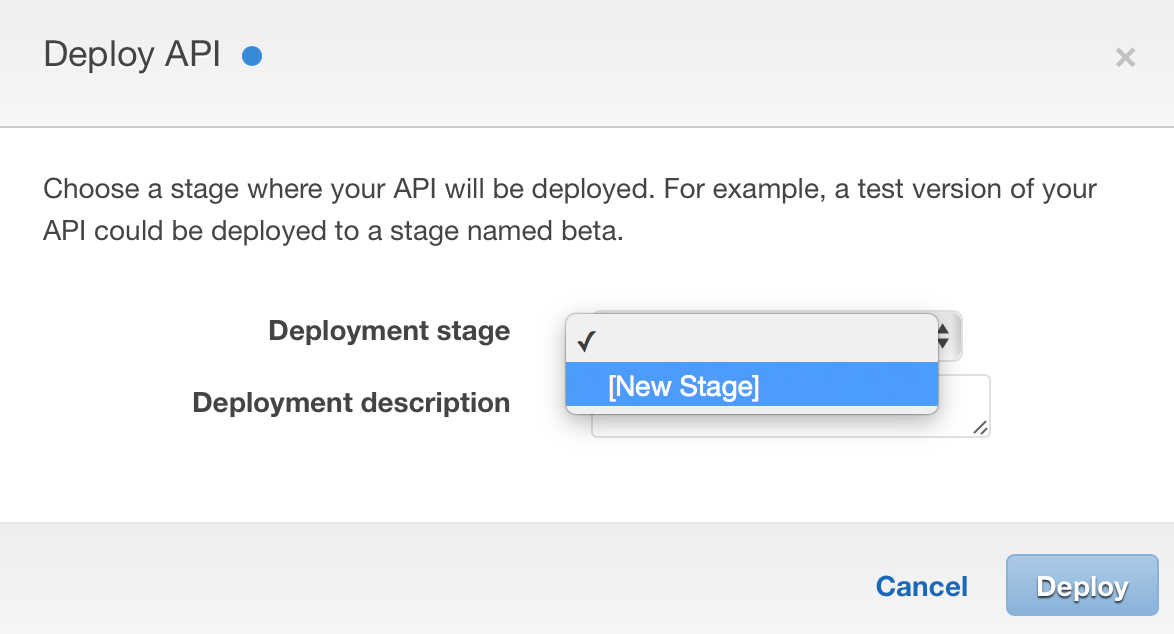
You can then give your stage a name (note: this will appear in the URI), description and a deployment description:
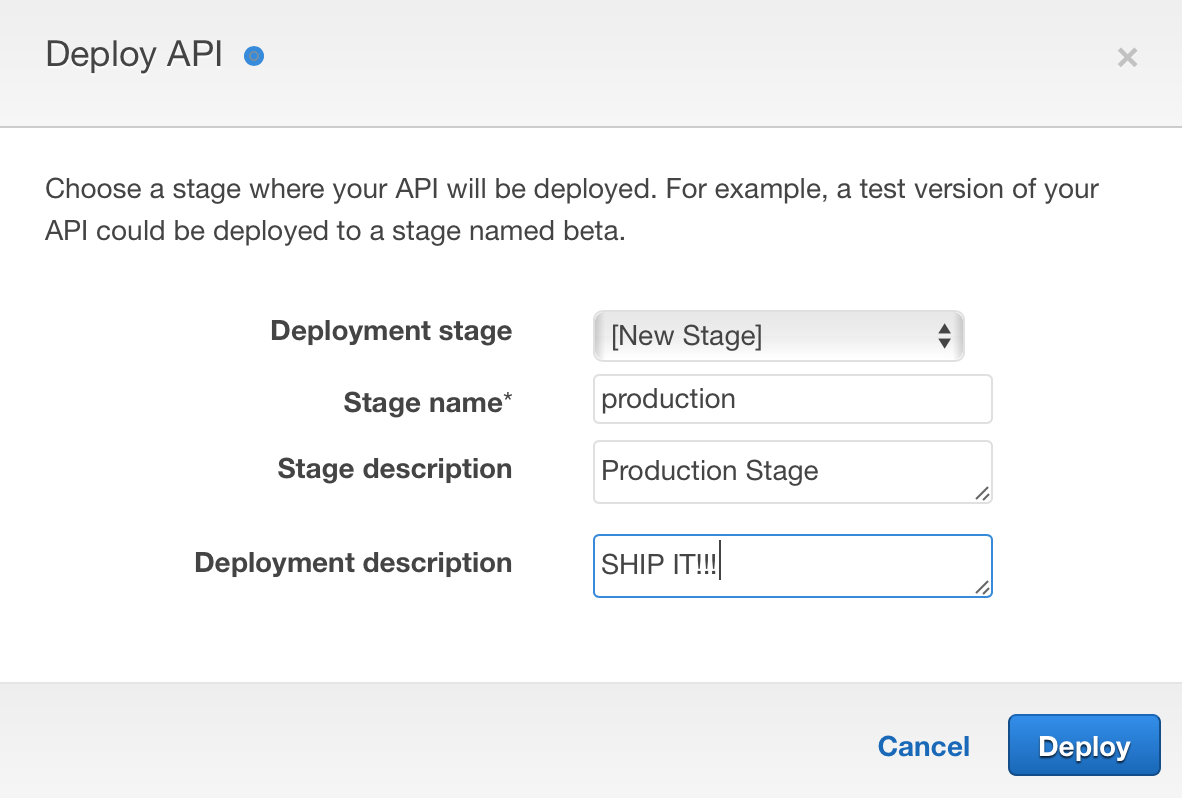
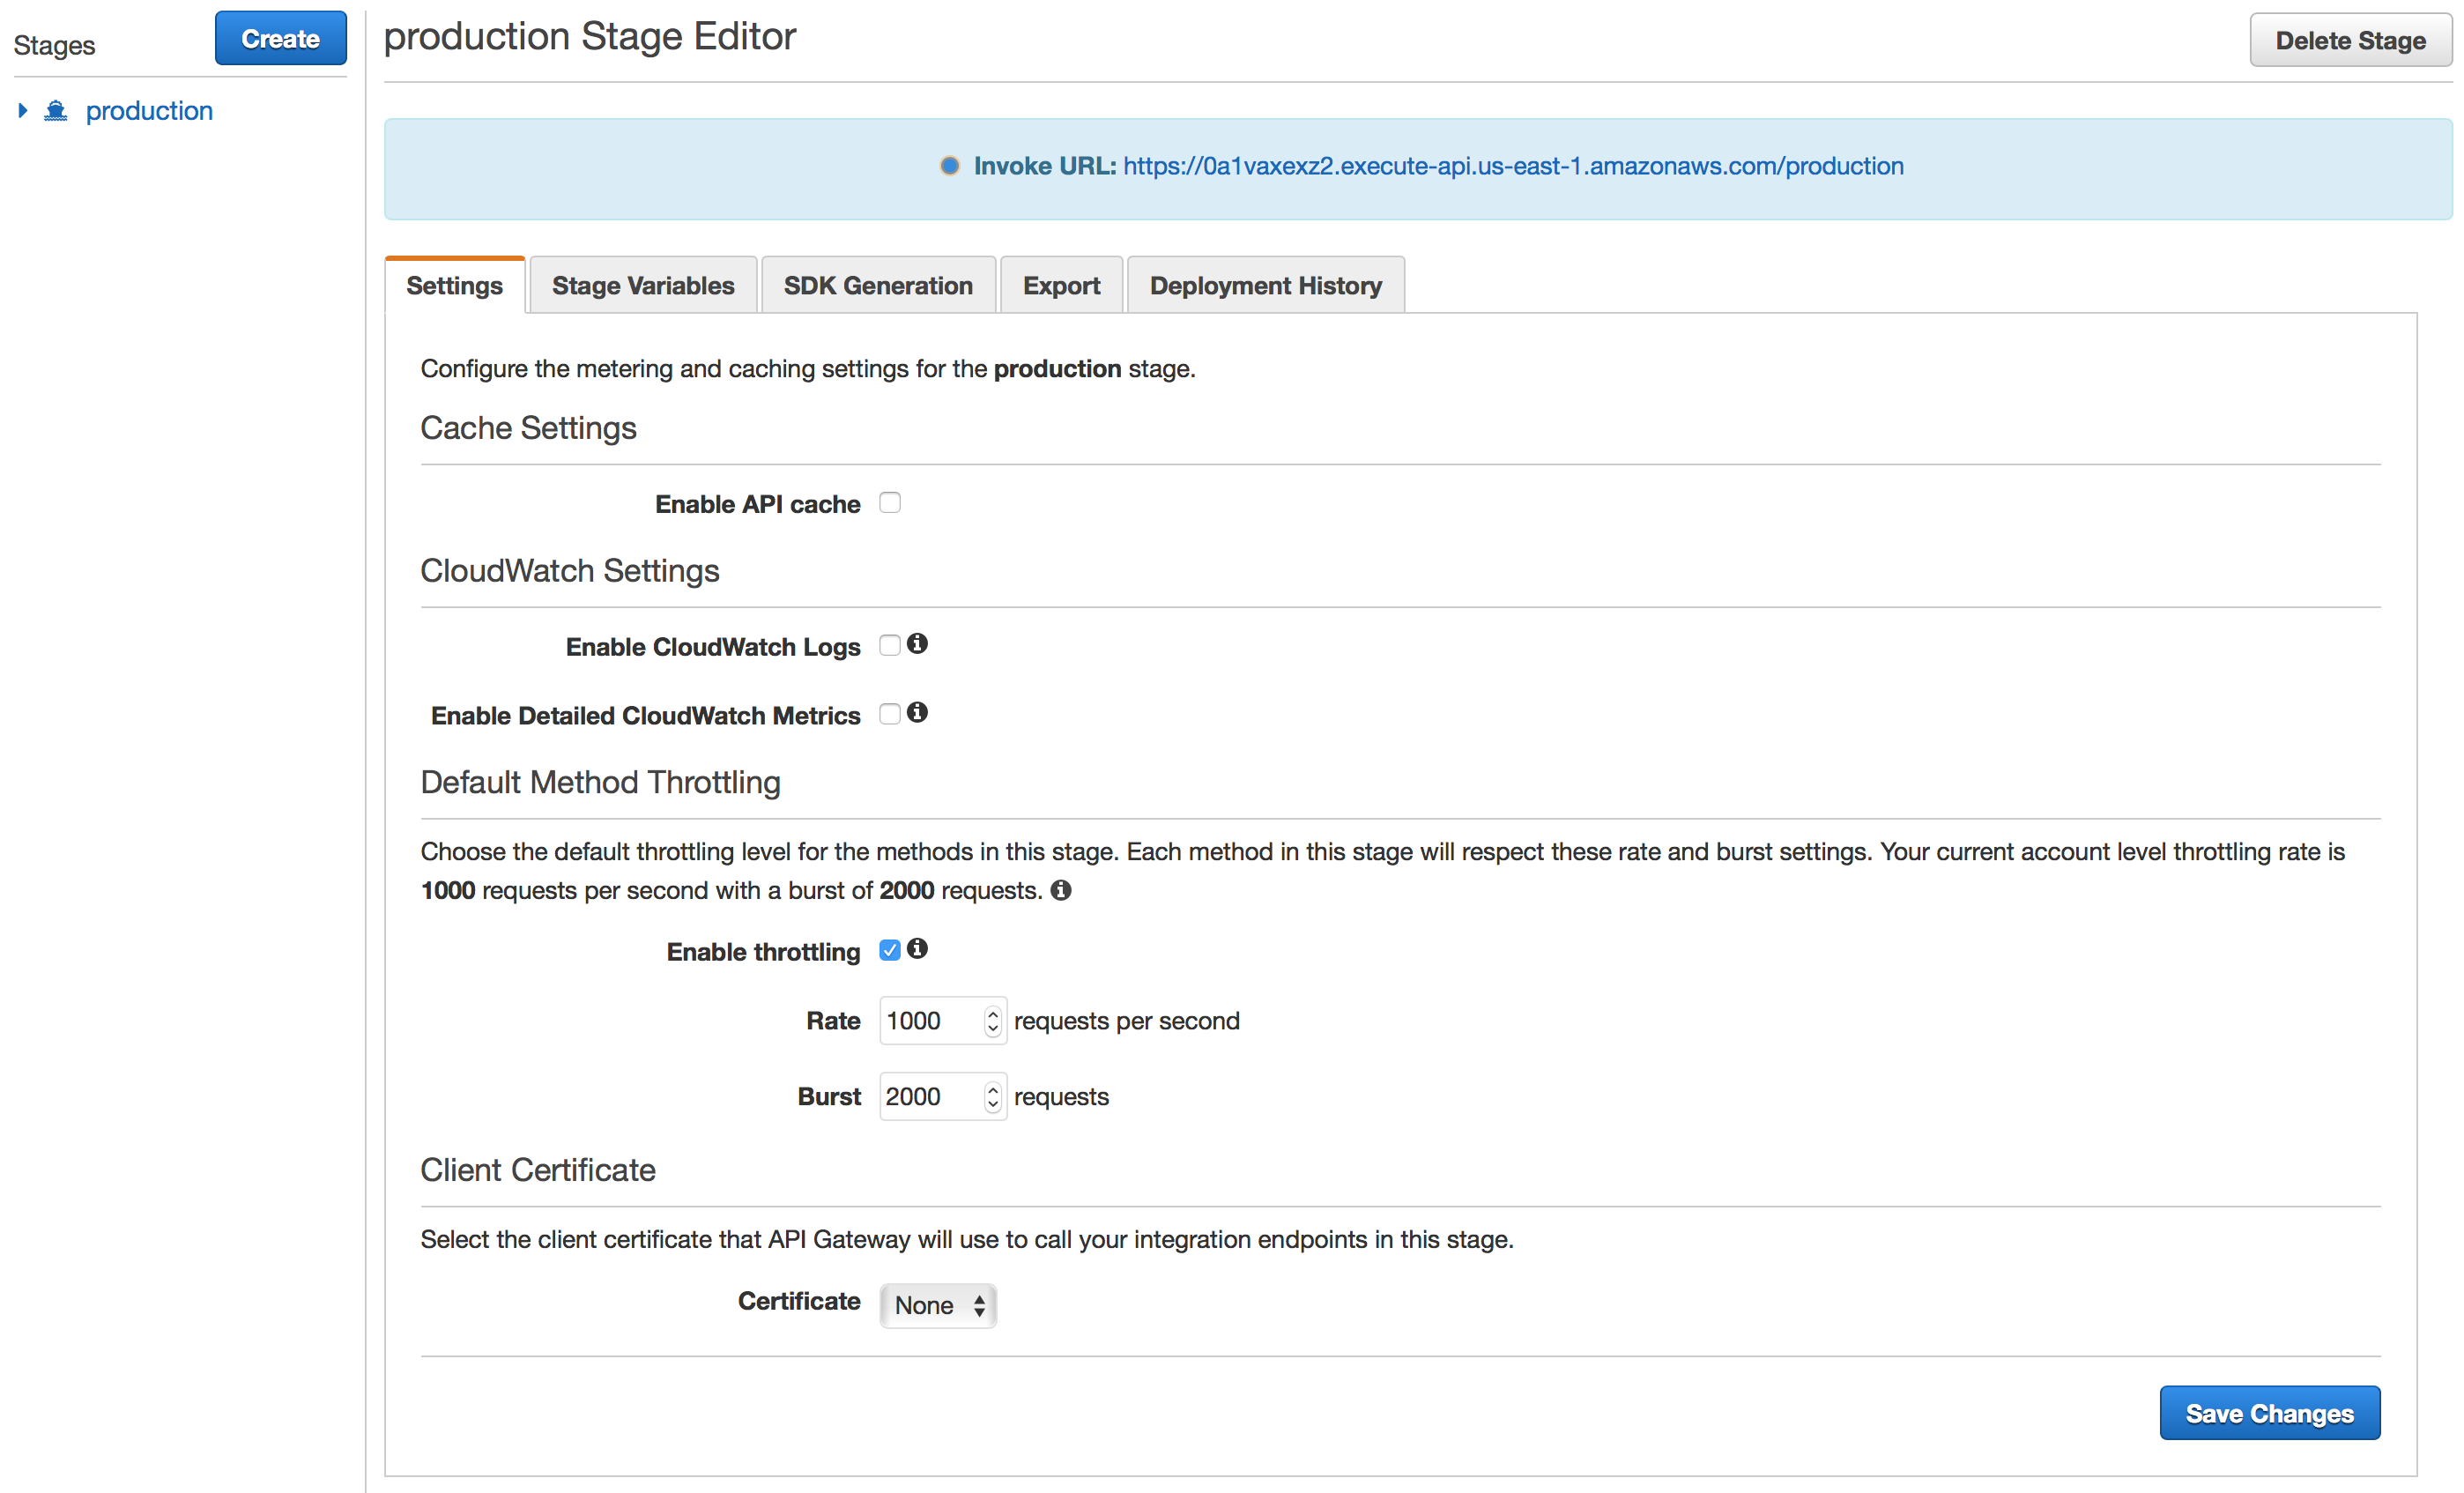
Pressing the “Deploy” button completes the process. You should see a stage editor similar to the following:
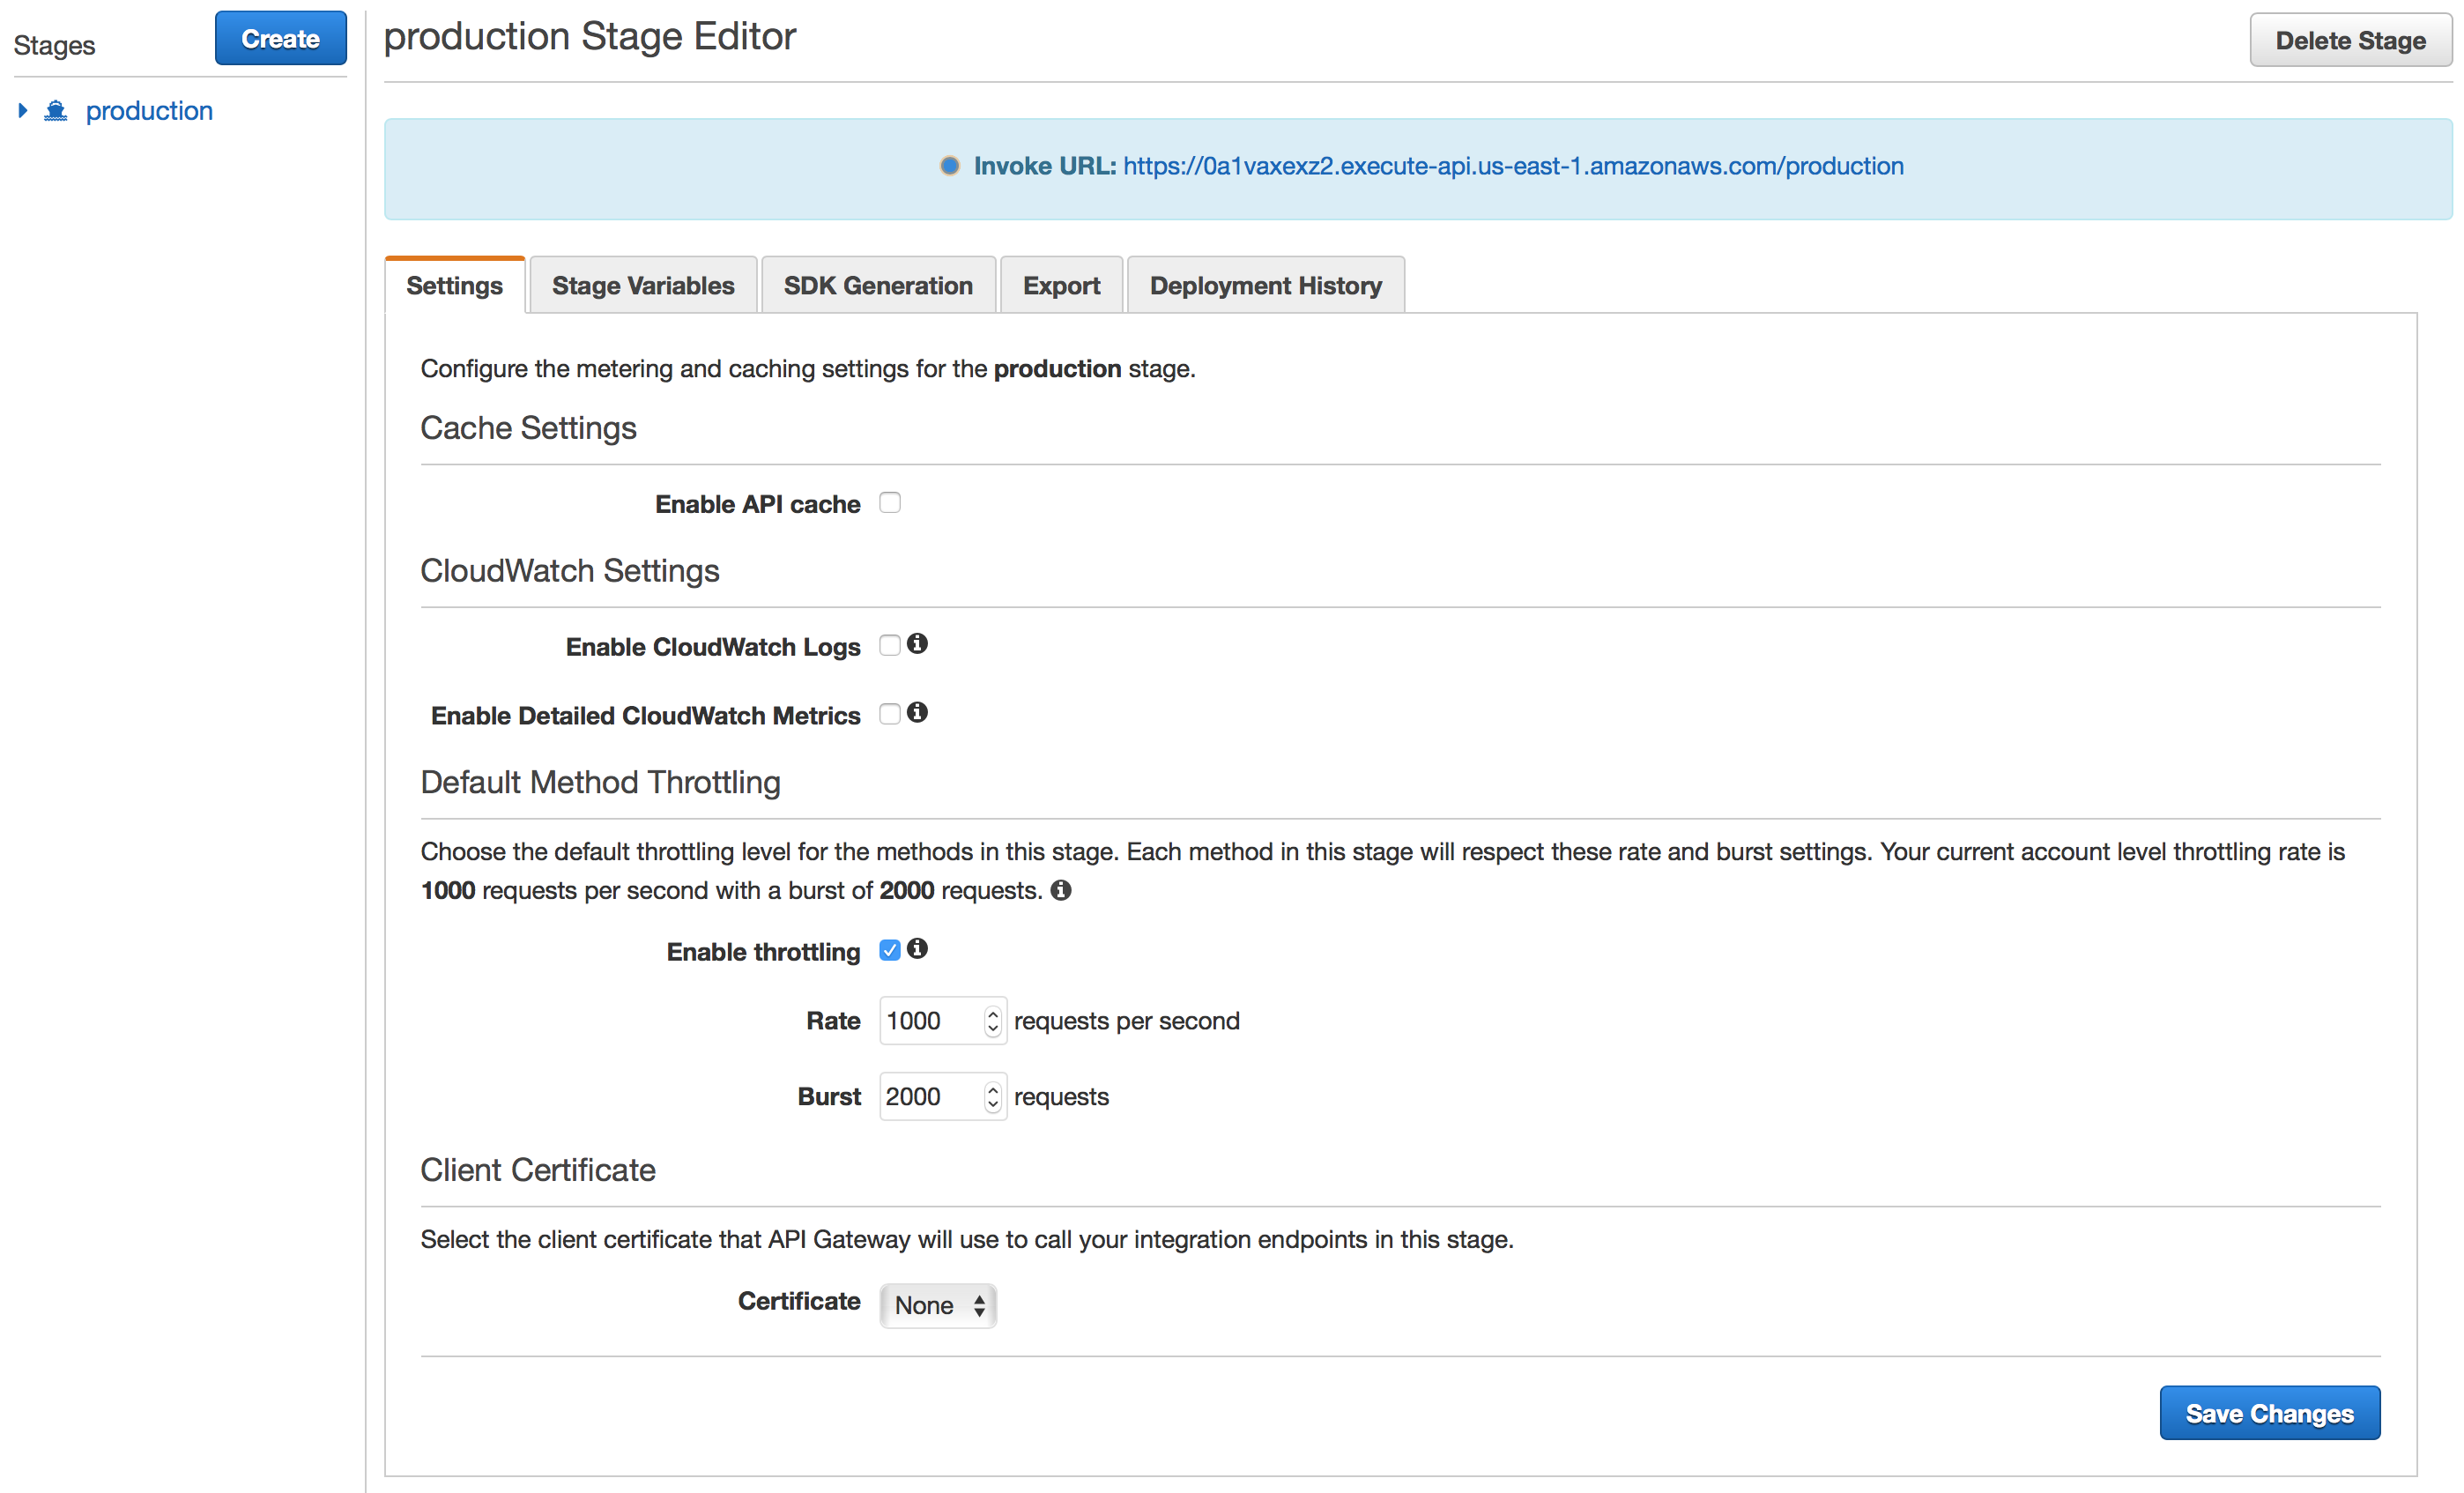
I strongly recommend you tick the boxes for “Enable CloudWatch Logs” and “Enable Detailed CloudWatch Metrics” at the beginning as this will make the logging to CloudWatch verbose enough for you to troubleshoot any issues that arise.
At the top of the stage editor you will find the URI to your new API. You should visit this URI and make sure you are denied access!
Last, but not least, you can test your new API using Postman or Swagger by exporting the API in those formats on the “Export” tab:
AWS provides some helpful documentation for testing your API with Postman here. In order to access the API and test it with Postman you’ll need a valid google account and a way to get a valid id_token. This will be discussed in detail in part five of this series when we implement the web application using this API. That being said, if you’d like to jump ahead check out the google documentation and my GitHub repository containing the web application code (the most interesting bit for getting a google id_token is found in init.js).
Summary
We now have fully secured and deployed the REST API created in part three of the series. In part five of the series we will discuss the application built over this API and how to deploy that application serverless.

3 comments